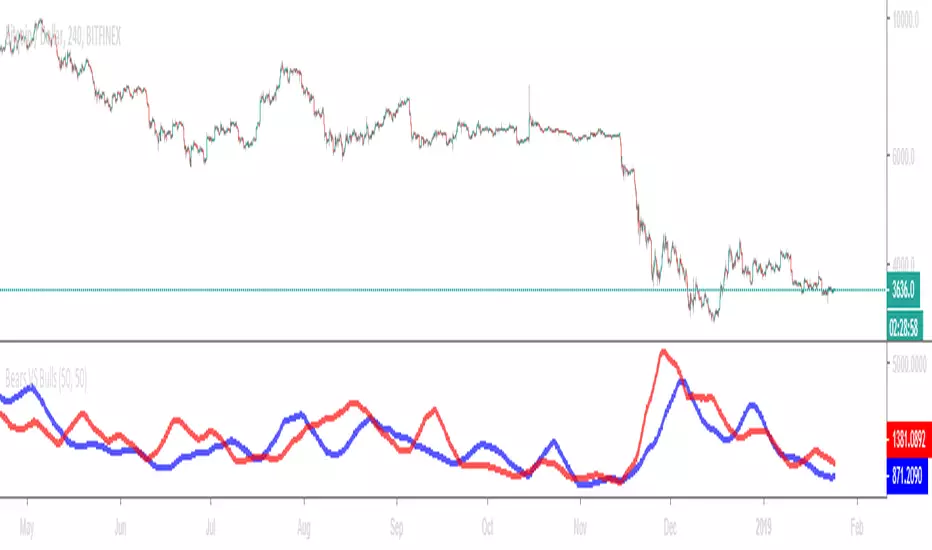
Stochastique Divergences IndicatorHello,
I made a custom indicator.
Divergences with stochastique and price are really strong signals.
About the indicator
A bullish divergence happens when the stoch K makes a higher low and is depicted by a green triangle up.
A bearish divergence happens when the stoch K makes a lower high and is depicted by a red triangle down.
This script is the base for my next strategy that I should upload soon.
I will grant access (to this script and my others) to people willing to make a small donation.
Here is my BTC address : 19sVQvCDmVfEACq7BiMnWSMqFPZ8qfSQ2K
If you prefer ETH : 0xc8a5d3a63a05db0c2363ea1c08b37a01cce9ebfb
Send me a Private Message with the ID of the transaction
If you want to do some forward testing first, send me a message.
Also check blockchainfiesta.com
Wyszukaj w skryptach "bear"
wTF50This is a customized trend filter that has several uses:
It helps identify trend direction, either bullish or bearish
It distinguishes between a pullback and a trend reversal
It helps identify areas where traders should stand aside
It highlights areas of consolidation
dTF50This is a customized trend filter that has several uses:
It helps identify trend direction, either bullish or bearish
It distinguishes between a pullback and a trend reversal
It helps identify areas where traders should stand aside
It highlights areas of consolidation
OBV divergence hidden and regular on both bearish and bullish.OBV (on balance volume) divergence indicator with hidden and regular signal on both bearish and bullish.
CMYK VRMI◊ Introduction
This script indicates the relative movement of price x volume.
◊ Origin
Based on 'The Relative Momentum Index' by Roger Altman : February, 1993 issue of Technical Analysis of Stocks & Commodities magazine.
While RSI counts up and down days from close to close, the Relative Momentum Index counts up and down days from the close relative to a close x number of days ago.
This results in an RSI that is smoother. The input has been changed to the change of a smoothed close multiplied by a smoothed volume.
The polarity of VRMI indicates bearish/bullish movement.
◊ Adjustments
CMYK color theme applied.
◊ Usage
VRMI indicates the force the market moves with.
◊ Future Prospects
-
◊ ◊ ◊ ◊ ◊ ◊ ◊ ◊ ◊ ◊ ◊ ◊ ◊ ◊ ◊ ◊ ◊ ◊ ◊ ◊ ◊ ◊ ◊ ◊ ◊ ◊ ◊ ◊ ◊ ◊ ◊ ◊ ◊ ◊ ◊ ◊ ◊ ◊ ◊ ◊ ◊ ◊ ◊ ◊ ◊ ◊ ◊ ◊ ◊ ◊ ◊ ◊ ◊ ◊ ◊ ◊ ◊ ◊ ◊ ◊ ◊ ◊ ◊ ◊ ◊ ◊ ◊ ◊ ◊ ◊ ◊ ◊ ◊ ◊ ◊ ◊ ◊ ◊ ◊ ◊ ◊ ◊ ◊ ◊ ◊ ◊ ◊ ◊ ◊ ◊ ◊ ◊ ◊ ◊ ◊ ◊ ◊ ◊ ◊ ◊ ◊ ◊ ◊ ◊ ◊ ◊
CMYK VRMI RAYS ◊ Introduction
Introducing VRMI in this script, an RMI based on price movement and volume, to indicate bullish and bearish trends.
This script marks the background depending on RMI <> VRMI , VRMI polarity and large buy/sell sprees.
◊ Origin
Based on 'The Relative Momentum Index' by Roger Altman : February, 1993 issue of Technical Analysis of Stocks & Commodities magazine.
While RSI counts up and down days from close to close, the Relative Momentum Index counts up and down days from the close relative to a close x number of days ago.
This results in an RSI that is smoother.
In addition VRMI reacts quick, it is used to cut off latency from RMI, and it's polarity indicates the beginning and end of a trend.
Large buy sell sprees and detected in their proportion with an sma on the volume
◊ Adjustments
CMYK color theme applied.
◊ Usage
This indicator can be used to detect trends and mark reversals.
◊ Prospects
◊ ◊ ◊ ◊ ◊ ◊ ◊ ◊ ◊ ◊ ◊ ◊ ◊ ◊ ◊ ◊ ◊ ◊ ◊ ◊ ◊ ◊ ◊ ◊ ◊ ◊ ◊ ◊ ◊ ◊ ◊ ◊ ◊ ◊ ◊ ◊ ◊ ◊ ◊ ◊ ◊ ◊ ◊ ◊ ◊ ◊ ◊ ◊ ◊ ◊ ◊ ◊ ◊ ◊ ◊ ◊ ◊ ◊ ◊ ◊ ◊ ◊ ◊ ◊ ◊ ◊ ◊ ◊ ◊ ◊ ◊ ◊ ◊ ◊ ◊ ◊ ◊ ◊ ◊ ◊ ◊ ◊ ◊ ◊ ◊ ◊ ◊ ◊ ◊ ◊ ◊ ◊ ◊ ◊ ◊ ◊ ◊ ◊ ◊ ◊ ◊ ◊ ◊ ◊ ◊ ◊
Bullish and Bearish Engulfing Patterns auto detectionThis simple indicator detects automatically most important bullish and bearish candlestick patterns formations. Used to locate potential supply and demand imbalances.
Copyright 2017 Alfonso Moreno www.set-and-forget.com
Super Envolvente (Bullish y Bearish)Identificador de Super-envolventes (SE), se encarga de darle un color verde a la SE alzista (Bullish) verde y rojo a la bajista (Bearish).
Bears VS BullsThis indicator will work on ANY instrument.
The red line is a moving average of ONLY sellers in the market.
The blue line is a moving average of ONLY buyers in the market.
The period or "length" of the individual moving averages can be adjusted in the indicator settings.
The default, it is set to 50.
Buying and selling trends often provide indications of market moves such as the most recent bottom in Cryptocurrencies.
Feel free to comment and share any indicator concepts or ideas for content you would like to see added to the Technical Indicator Bundle on www.kenzing.com
Bearish Trailing stopIt is a trailing SL. Works very well. Good good very good. Looks like my description needs more, so here is more random text.
bearish Price Below PDL - Complete Multi-Confirmation Alert🎯 KEY IMPROVEMENTS:
1. Enhanced Alert Visibility:$jmoskyhigh
✅ HUGE triangle down marker with "SELL" text
✅ Alert title: "SELL SIGNAL - PDL BREAKDOWN CONFIRMED"
✅ Prominent info panel with red theme
✅ Clear "SELL ALERT: TRIGGERED" status
2. Better Visual Feedback:
Red frame around info panel
Larger shapes and markers
Color-coded confirmations (green = OK, red = FAIL)
Progress percentage displayed
Breakdown price label
3. Complete Alert System:
Main Alert: "SELL SIGNAL - PDL BREAKDOWN CONFIRMED"
Early Warning: "PDL Breakdown Started - Monitoring"
Reset Alert: "Confirmation Lost - Breakdown Reset"
Bearish signal using Point of Control (POC) with PAC by guruThis indicator code helps traders identify potential sell opportunities using several important technical indicators:
Point of Control (POC) – This is the price level where the most volume was traded over the past several days.
Previous Day's Low – This shows the lowest price reached during the previous day.
PAC (Price Action Channel) EMA – These are two moving averages (one based on the low price and one based on the close price) that help determine if the price is trending within a certain range.
Volume SMA – This is a 3-day simple moving average (SMA) of volume, which helps filter out signals based on market activity.
What the Script Does:
Point of Control (POC):
The script looks at the last 50 days (configurable) and calculates which price level had the highest trading volume.
It then plots a red line on the chart at the POC level. This is important because it helps identify areas where there was strong market interest in the past.
Volume Moving Average:
The script calculates a 3-day SMA of volume, but it excludes the current day to avoid premature signals based on today’s trading.
The volume SMA is used to ensure there’s enough market activity (with a threshold set to 25 units) before triggering a sell signal.
Price Action Channel (PAC) EMA:
The PAC consists of two exponential moving averages (EMAs):
The PAC Low EMA: This is based on the low prices over the last 34 periods (configurable).
The PAC Close EMA: This is based on the closing prices over the last 34 periods.
These EMAs help determine if the price is trending above or below certain price levels.
Sell Signal Logic: The script checks three conditions before displaying a "Sell" signal:
Price Below POC and Previous Day’s Low:
The close price must be below both the Point of Control (POC) and the previous day's low.
Volume SMA Above 25:
The 3-day volume SMA must be greater than 25. This ensures the signal only triggers when there’s enough trading volume in the market.
Today’s Low is Above PAC EMAs:
Today's low price must be above both the PAC low EMA and the PAC close EMA. This prevents sell signals when prices are already significantly below the PAC, indicating possible exhaustion in the downtrend.
If all three conditions are met, the script will display a red "Sell" label on the chart, signaling a potential selling opportunity.
No Sell Signal if Price Reverses:
If the price crosses back above the POC or the previous day's low, the script will remove the sell signal and reset for a new opportunity.
Summary of Conditions:
For the script to display a "Sell" label:
The close price must be below the Point of Control (POC) and the previous day’s low.
The 3-day volume SMA (excluding today) must be greater than 25 units.
The low price of the current day must be above both the PAC low EMA and the PAC close EMA.
If these conditions are met, a red sell label appears on the chart as a potential signal for a short (sell) trade.
Bearish FS Continuation S1BB - baby bar / inside bar
DF - downflow, meaning 20MA below 50MA
EXE - execution bar, indicator to short
Mainly to identify execution bar for shorting using inside bar identification and force top
Guneet-ScalperBearish trend candle color change to red with sell print
Bullish trend candle color change to green with buy print
thanks
jas toor
RVI - Relative Vigor Index | With Critical Levels📊 RVI - Relative Vigor Index | With Critical Levels (±0.23)
═════════════════════════════════════════════════════════════
📌 OVERVIEW
═════════════════════════════════════════════════════════════
The Relative Vigor Index (RVI) is a momentum oscillator that measures the strength of a trend by comparing the closing price to the trading range of a given period. The core principle behind RVI is simple yet powerful: in bullish markets, prices tend to close higher than they open, while in bearish markets, prices tend to close lower than they open. By quantifying this relationship, RVI provides traders with a reliable tool for identifying trend direction, momentum shifts, and potential reversal points.
Originally developed by John Ehlers and introduced in the January 2002 issue of "Technical Analysis of Stocks & Commodities" magazine, the RVI applies a symmetric weighted moving average (similar to a digital signal processing filter) to smooth out market noise while preserving meaningful price action signals. This makes it particularly effective on shorter timeframes where noise reduction is critical.
This implementation includes pre-set critical levels at +0.23 and -0.23, which have been calibrated through extensive observation on XAUUSD (Gold) M5 charts. These levels serve as overbought and oversold thresholds, helping traders identify high-probability reversal zones when combined with additional confirmation tools.
═════════════════════════════════════════════════════════════
📐 CALCULATION METHODOLOGY
═════════════════════════════════════════════════════════════
The RVI calculation follows a multi-step process designed to extract the true momentum signal from raw price data:
STEP 1 — VIGOR MEASUREMENT:
For each bar, the difference between Close and Open is calculated. This value represents the "vigor" or internal strength of that particular candle. A positive value indicates bullish vigor (buyers dominated), while a negative value indicates bearish vigor (sellers dominated).
STEP 2 — SYMMETRIC WEIGHTED SMOOTHING (NUMERATOR):
To reduce noise and give more weight to recent bars, a 4-bar symmetric weighted average is applied:
Numerator = (Close-Open) + 2×(Close -Open ) + 2×(Close -Open ) + (Close -Open )
The weighting scheme (1-2-2-1) acts as a finite impulse response (FIR) filter, which is superior to simple moving averages for preserving signal integrity while eliminating random fluctuations.
STEP 3 — RANGE NORMALIZATION (DENOMINATOR):
The same symmetric weighting is applied to the High-Low range to normalize the vigor measurement relative to volatility:
Denominator = (High-Low) + 2×(High -Low ) + 2×(High -Low ) + (High -Low )
This normalization ensures that the RVI output is comparable across different volatility regimes and instruments.
STEP 4 — SUMMATION AND DIVISION:
Both the numerator and denominator are summed over the user-defined period (default: 10 bars), and the RVI value is obtained by dividing the two:
RVI = Sum(Numerator, Period) / Sum(Denominator, Period)
The resulting value oscillates around zero with no fixed upper or lower boundary, though in practice it rarely exceeds ±0.5.
STEP 5 — SIGNAL LINE:
A signal line is derived from the RVI using another symmetric weighted average:
Signal = (RVI + 2×RVI + 2×RVI + RVI ) / 6
The crossover between the RVI line and the Signal line generates trading signals similar to MACD crossovers, but based on open-close dynamics rather than moving average convergence.
════════════════════════════════════════════════════════════
📏 LEVEL DEFINITIONS AND INTERPRETATION
═════════════════════════════════════════════════════════════
🟡 +0.23 LEVEL (Upper Yellow Dashed Line):
When RVI crosses above +0.23, momentum has reached an extreme bullish state. While this confirms strong upward pressure, it also signals that the move may be overextended. Traders should watch for:
• RVI crossing back below +0.23 as a potential sell trigger
• RVI-Signal line bearish crossover above this level
• Divergence between price making new highs while RVI fails to do so
This level does NOT mean "sell immediately" — it means "be cautious about opening new longs and start watching for reversal confirmation."
⚪ ZERO LINE (Gray Dotted Line):
The zero line represents the equilibrium between bullish and bearish vigor. Key interpretations:
• RVI crossing above zero → Bullish momentum is taking control
• RVI crossing below zero → Bearish momentum is taking control
• Extended periods above/below zero confirm trend persistence
• Quick crosses back and forth indicate a ranging or indecisive market
🟡 -0.23 LEVEL (Lower Yellow Dashed Line):
When RVI drops below -0.23, momentum has reached an extreme bearish state. While this confirms strong selling pressure, it also warns that the decline may be reaching exhaustion. Traders should watch for:
• RVI crossing back above -0.23 as a potential buy trigger
• RVI-Signal line bullish crossover below this level
• Divergence between price making new lows while RVI fails to do so
Similar to the upper level, this does NOT mean "buy immediately" — it means "be cautious about opening new shorts and start watching for reversal confirmation."
═════════════════════════════════════════════════════════════
🎯 TRADING APPLICATIONS
═════════════════════════════════════════════════════════════
1. TREND CONFIRMATION:
• RVI consistently above zero → Uptrend is healthy
• RVI consistently below zero → Downtrend is healthy
• Use this to confirm signals from other indicators or price action patterns
2. CROSSOVER SIGNALS:
• RVI crosses above Signal line → Bullish momentum increasing
• RVI crosses below Signal line → Bearish momentum increasing
• Crossovers carry more weight when they occur at extreme levels (above +0.23 or below -0.23)
3. DIVERGENCE DETECTION:
• Bullish divergence: Price makes a lower low but RVI makes a higher low → Potential bottom
• Bearish divergence: Price makes a higher high but RVI makes a lower high → Potential top
• Divergences at the ±0.23 levels are particularly significant
4. OVERBOUGHT/OVERSOLD IDENTIFICATION:
• RVI above +0.23 → Overbought zone, watch for bearish reversal signals
• RVI below -0.23 → Oversold zone, watch for bullish reversal signals
• These levels work best when combined with Stochastic, ADX, or other momentum filters
5. ZERO-LINE REJECTION:
• In an uptrend, RVI pulling back to zero and bouncing → Continuation signal
• In a downtrend, RVI rallying to zero and getting rejected → Continuation signal
═════════════════════════════════════════════════════════════
🔗 SUGGESTED COMBINATIONS
═════════════════════════════════════════════════════════════
RVI works best as a confirmation tool rather than a standalone signal generator. Recommended combinations include:
- RVI + STOCHASTIC (14,3,3):
Use Stochastic for overbought/oversold identification (90/10 levels) and RVI for momentum direction confirmation. When both align, signal reliability increases significantly.
- RVI + ADX (14):
Use ADX to measure trend strength. When ADX > 25, only take RVI signals in the direction of the trend. When ADX < 20, RVI mean-reversion signals (at ±0.23) become more effective.
- RVI + EMA CROSSOVER:
Use EMA (21/55 or 50/200) to determine the dominant trend direction, then use RVI crossovers and level breaks to time entries within that trend.
- RVI + PRICE ACTION:
Look for RVI divergences at key support/resistance levels, supply/demand zones, or Fibonacci retracement levels for high-conviction trade setups.
═════════════════════════════════════════════════════════════
⚙️ SETTINGS
═════════════════════════════════════════════════════════════
- RVI Period (Default: 10)
Controls the lookback period for the summation. Lower values (7-8) make the indicator more responsive but noisier. Higher values (12-14) produce smoother signals with more lag. The default of 10 provides a balanced approach suitable for most timeframes.
- Upper Level (Default: 0.23)
The overbought threshold. Adjust based on the instrument and timeframe. For higher timeframes (H1, H4), consider using 0.20. For very short timeframes (M1), consider 0.25-0.30.
- Lower Level (Default: -0.23)
The oversold threshold. Should mirror the upper level. Adjust symmetrically with the upper level.
═════════════════════════════════════════════════════════════
📋 VISUAL GUIDE
═════════════════════════════════════════════════════════════
- Green Line (Thicker) → RVI Main Line
- Red Line (Thinner) → Signal Line
- Yellow Dashed Lines → ±0.23 Critical Levels
- Gray Dotted Line → Zero Line (Neutral)
═════════════════════════════════════════════════════════════
⚠️ DISCLAIMER
═════════════════════════════════════════════════════════════
This indicator is provided for educational and informational purposes only. It does not constitute financial advice, investment advice, or trading advice. No indicator can predict future price movements with certainty. Always use proper risk management, test thoroughly on demo accounts before live trading, and never risk more than you can afford to lose. Past performance does not guarantee future results. The ±0.23 levels are observational guidelines, not guaranteed reversal points. Always seek confirmation from multiple sources before making trading decisions.
═════════════════════════════════════════════════════════════
If you find this indicator useful, please consider giving it a like 👍
Feel free to leave comments or suggestions for improvement.
Happy trading! 🚀
HTF Breaker Blocks [TakingProphets]HIGH TIME FRAME BREAKER BLOCKS
High Time Frame Breaker Blocks detects ICT-style Breaker Blocks using a structure shift + breaker
candle selection process, then plots clean, forward-extending breaker zones on the current timeframe and
projects the same logic from higher timeframes down onto your chart.
This version is designed to match the UI and behavior style of our HTF Rejection Blocks v2
- minimal settings
- strict object management to prevent clutter and object limit issues
- closest-per-side filtering per timeframe
-----------------------------------------------------------------------------------------------
WHAT IS A BREAKER BLOCK
-----------------------------------------------------------------------------------------------
A Breaker Block is a structure-based zone that forms after a market structure shift is confirmed, using a
specific breaker candle to define the zone boundaries.
Conceptually
- price breaks structure
- a qualifying breaker candle is selected inside the swing range
- that candle’s range becomes the breaker zone
- the breaker zone is extended forward until invalidated
-----------------------------------------------------------------------------------------------
WHAT THIS INDICATOR DISPLAYS
-----------------------------------------------------------------------------------------------
Current Timeframe Breaker Blocks
- Detects breaker blocks on the chart timeframe
- Creates a clean breaker zone and extends it forward
- Optional 50% level through the breaker
- Optional invalidation handling
Higher Timeframe Breaker Blocks Projection
- Projects breaker blocks from up to 3 higher timeframes onto your current chart
- HTF events are calculated inside request.security with lookahead off
- Invalidation for HTF breakers is based on the source timeframe close
- Per HTF timeframe, keeps only the closest N bullish and the closest N bearish breakers visible
Quadrant Levels
- Optional internal levels: 0%, 25%, 50%, 75%, 100%
- Each level can be toggled independently and optionally labeled
- Midline behavior is tied to the 50% quadrant setting
-----------------------------------------------------------------------------------------------
MODEL FLOW
-----------------------------------------------------------------------------------------------
Step 1: Swing Mapping
- Internally tracks swing highs and swing lows using pivot logic
- Maintains a rolling swing state so structure events can be validated consistently
Step 2: Structure Shift Detection
- A structure shift is detected when price breaks above or below the relevant swing point
- The engine uses swing sequencing to confirm the shift and reduce noise
Step 3: Breaker Candle Selection
- Once a shift is detected, the script scans the swing range to find the qualifying candle
- The breaker zone is defined by that candle’s high and low or body range based on internal logic
Step 4: Zone Creation and Extension
- A new breaker zone is created and extended forward
- Output is a single clean zone per breaker with no extra stationary template boxes
Step 5: Invalidation
Two different invalidation rules are applied depending on where the breaker comes from
Current timeframe breakers
- evaluated on bar close
- bullish invalidates when close is below the breaker bottom
- bearish invalidates when close is above the breaker top
Higher timeframe projected breakers
- evaluated using the confirmed close of the source timeframe
- bullish invalidates when source close is at or below the breaker bottom
- bearish invalidates when source close is at or above the breaker top
Step 6: Visibility Filtering
- For each enabled higher timeframe, only the closest breakers to current price are shown
- Keeps charts readable and avoids object limit issues
-----------------------------------------------------------------------------------------------
SETTINGS GUIDE
-----------------------------------------------------------------------------------------------
General
- Maximum visible BBs per timeframe
- For each enabled higher timeframe, shows only the closest 1 or 2 bullish and the closest 1 or 2 bearish breakers
- Hide invalid breakers
- If enabled, removes breakers once invalidated
- If disabled, invalidated breakers stop extending and remain as historical reference
Higher Timeframes
- Current Timeframe
- Toggle current timeframe breaker detection on or off
- HTF1, HTF2, HTF3
- Enable and choose source timeframe to project down
- Colors
- Separate bullish and bearish colors for current timeframe and each HTF source
- Show timeframe label
- Displays the source timeframe tag on each higher timeframe breaker box
Visual
- Remove box fill
- Hides the breaker box visuals while keeping internal quadrant levels and labels
- Show quadrant levels
- Master toggle for internal levels
- Quadrant toggles
- 0%, 25%, 50%, 75%, 100%
- Optional labels per level
Alerts
- Enable Alerts
- Session windows in New York time
- Session 1, Session 2, Session 3
- Bullish BB alert
- Bearish BB alert
- Alert templates support {{symbol}} and {{tf}}
-----------------------------------------------------------------------------------------------
HOW TO USE
-----------------------------------------------------------------------------------------------
Clean HTF context on LTF execution
- Enable HTF1 such as 60m and optionally HTF2 such as 240m
- Set Maximum visible BBs per timeframe to 1 or 2 depending on how much context you want
- Keep only the 50% quadrant enabled for simple midpoint execution
If you want minimal clutter
- Enable Remove box fill
- Disable 0% and 100%
- Leave 25%, 50%, 75% or only 50%
If you want only active zones
- Keep Hide invalid breakers enabled
If you want historical reference zones
- Turn Hide invalid breakers off so invalidated zones freeze instead of disappearing
-----------------------------------------------------------------------------------------------
NOTES ON PERFORMANCE
-----------------------------------------------------------------------------------------------
This script uses internal safety caps to reduce the chance of hitting TradingView object limits
- Limits total stored breakers per higher timeframe stream
- Removes visuals for non-visible breakers instead of keeping everything drawn
- De-duplicates projected breakers to prevent stacked duplicates
-----------------------------------------------------------------------------------------------
DISCLAIMER
-----------------------------------------------------------------------------------------------
This indicator is provided for educational and analytical purposes only.
It does not constitute financial advice.
Trading involves risk, and past performance is not indicative of future results.
© TakingProphets
-----------------------------------------------------------------------------------------------
Swing Trade StrategySwing Trade Strategy
📊 Overview
Multi-indicator trend-following system for cryptocurrency swing trading. Combines 10 technical indicators with weighted voting to identify high-probability trend reversals.
🎯 Key Features
10 indicators with weighted consensus voting (max 13 points Bull/Bear)
Trend confirmation system reduces false signals
Visual signals: Green/red trend line, buy/sell arrows, position backgrounds
Real-time dashboard: Shows Bull/Bear scores and trend strength
Long-only positions with automatic exits during bear markets
📈 How It Works
Entry: When Bull score exceeds Bear score by +2 (WEAK BULL) or +5 (STRONG BULL), confirmed over 2 bars
Exit: When Bear score exceeds Bull score by -2, confirmed over 2 bars
Indicators: RMI, ALMA, CTI, EMA crossovers, DEMA DMI, Stochastic, Trend Oscillators, and more
📊 Performance Characteristics
Trades: 4-5 per year (swing trading approach)
Win Rate: 39% (fewer wins but larger gains)
Profit Factor: 2.4+ (winners are 2.4x larger than losers)
Max Drawdown: -42%
⚙️ Settings
Timeframe: Daily (1D) recommended
Position Size: 95% of equity
Commission: 0.1% per trade
Asset: Optimized for BTC/crypto
💡 Usage
Apply to BTC Daily chart
Green arrow = BUY, Red arrow = SELL
Monitor dashboard for trend strength
Hold positions until opposite signal
⚠️ Risk Warning
Max 42% drawdown - high risk tolerance required
Long-only strategy - no shorting
Optimized for crypto markets
Past performance ≠ future results
Version: 1.0 | Pine Script: v6 | Style: Trend Following
RSI / Stoch RSI Combo (Overlay)RSI + Stoch RSI Overlay combines two of TradingView’s most-used momentum tools into a single clean oscillator pane: Relative Strength Index (RSI) for broader momentum/strength and Stochastic RSI (K/D) for faster timing signals.
What you see
RSI line (classic momentum/strength)
Stoch RSI K & D lines (fast momentum/timing)
Optional RSI zones (70/50/30) with gradient fills
Optional Stoch RSI zones (80/50/20) with background fill
Why it’s useful
RSI is great to judge the “bigger” momentum regime, while Stoch RSI is great for entries/exits timing inside that regime. Overlaying both helps you quickly answer:
Is momentum bullish/bearish overall (RSI)?
Is price stretched or resetting (Stoch RSI 80/20 + K/D crosses)?
Are reversals supported by RSI structure or just a quick Stoch RSI fluctuation?
How it’s calculated
RSI is calculated from the selected source (default: close) and length.
Stoch RSI is calculated using the RSI values (not price), then smoothed into:
- K = SMA of Stoch(RSI) over “K” smoothing
- D = SMA of K over “D” smoothing
Optional features
RSI Smoothing: Add an RSI-based moving average (SMA/EMA/SMMA/WMA/VWMA) to reduce noise.
Bollinger Bands on RSI MA: If “SMA + Bollinger Bands” is selected, bands are plotted around the smoothing MA.
Divergence (optional): Enable classic regular bullish/bearish divergence detection on RSI (hidden by default to keep the UI clean) and use alert conditions.
Signals traders often look for
Trend bias: RSI above 50 = bullish pressure; below 50 = bearish pressure.
Overbought/oversold:
-> RSI 70/30 zones for broader momentum extremes
-> Stoch RSI 80/20 zones for faster “stretch / reset”
Timing: Stoch RSI K/D crosses near 20 or 80 can help time pullbacks or reversals—best when aligned with RSI context.
Alerts
Regular Bullish Divergence
Regular Bearish Divergence
(Enable “Calculate Divergence” in settings to activate.)
Notes
This is an oscillator tool, not a standalone trading system.
Works on any market/timeframe; consider combining with structure/trend confirmation.


