High-Probability Scalper (Market Open)Market open is where volatility is real, spreads are tight, and momentum shows itself early. This scalping strategy is built specifically to operate during that window, filtering out low-quality signals that usually appear later in the session.
Instead of trading all day, the logic is restricted to the first 90 minutes after market open, where continuation moves and fast pullbacks are more reliable.
What This Strategy Does
This script looks for short-term momentum alignment using:
Fast vs slow EMA structure
RSI confirmation to avoid chasing extremes
ATR-based risk control
Session-based filtering to trade only when volume matters
It’s designed for intraday scalping, not swing trading.
Core Trading Logic
1. Market Open Filter
Trades are allowed only between 09:30 – 11:00 exchange time.
This avoids low-liquidity chop and focuses on the period where most breakouts and reversals form.
2. Trend Confirmation
Bullish bias: 9 EMA crosses above 21 EMA
Bearish bias: 9 EMA crosses below 21 EMA
This keeps trades aligned with short-term direction instead of random entries.
3. Momentum Check (RSI)
RSI is used as a quality filter, not as an overbought/oversold signal.
Long trades only when RSI is strong but not extended
Short trades only when RSI shows weakness without exhaustion
This removes late entries and reduces whipsaws.
Entries & Exits
Entries
Executed only on confirmed candles
No intrabar repainting
One position at a time
Risk Management
Stop-loss based on ATR
Take-profit calculated using a fixed risk–reward ratio
Same structure for both long and short trades
This keeps risk consistent across different symbols and volatility levels.
Why This Strategy Works Better at Market Open
Volume is highest
False breakouts are fewer
EMA crosses have follow-through
RSI behaves more cleanly
By not trading all day, the strategy avoids most of the noise that kills scalpers.
Best Use Cases
Index futures
High-liquidity stocks
Major crypto pairs during active sessions
1m to 5m timeframes
What This Strategy Is NOT
Not a martingale
Not grid-based
Not designed for ranging markets
Not a “set and forget” system
It’s a controlled scalping template meant for disciplined execution.
How to Use It Properly
Test on multiple symbols
Adjust ATR length for volatility
Tune RSI ranges per market
Always forward-test before live alerts
Final Note
This strategy focuses on structure, timing, and risk, not indicator stacking.
If you trade the open, this gives you a clear framework instead of emotional entries.
If you want:
Alerts
Session customization
News filters
Partial exits
You can extend this logic without breaking the core system.
Wskaźniki i strategie

FNO Simple Signals: EMA 9/21 + VWAP by Avis
How it behaves on chart (5 or 15 min F&O):
BUY signal: EMA 9 crosses above EMA 21 and price is above VWAP → one green “BUY” triangle under that candle.
SELL signal: EMA 9 crosses below EMA 21 and price is below VWAP → one red “SELL” triangle above that candle.
Below is a clean, stable indicator for F&O: EMA 9/21 + VWAP + very light ORB, no risky time arithmetic.

Swing HelperThis script, titled "Swing helper", is a multi-metric dashboard designed to provide a comprehensive snapshot of a security's volatility, relative volume, and price action health directly on the chart. It focuses on Average Daily Range (ADR) relationship and key performance indicators to help traders identify setups like volatility contractions or trend strength.
Key Features
Dual-ADR Analysis: Calculates and compares Long-Term (LT) and Short-Term (ST) ADR percentages. The ADR Ratio helps identify when volatility is expanding or contracting relative to historical norms.
Relative Volume (RVol): Compares current volume to a 20-day moving average, highlighting institutional participation.
Dynamic Closing Range: Visualizes where the price is closing relative to the day's true range (the "Closing Range %"), indicating buying or selling pressure.
SMA 50 Distance: A unique metric that measures the price's distance from the 50-day Simple Moving Average in "ADR units," helping to gauge how overextended a stock is.
Automated Price Projections: Dynamically plots -1x and -2x ADR levels from the current price to provide immediate downside targets or support levels.
Custom Bar Coloring: Highlights specific price action patterns:
Inside Days (Blue)
Upside Reversals (Green)
Downside Reversals (Red)
Visual Customization
The script includes a highly flexible Summary Table with customizable positions, sizes, and colors (including borders and headers), allowing it to fit into any dark or light mode chart layout without obstructing price action.
How to Use
Volatility Contraction: Watch for the ADR Ratio to drop, indicating a tightening range before a potential breakout.
Relative Strength: Look for high RVol combined with a high Closing Range % (e.g., >75%) to confirm strong demand.
Mean Reversion: Use the SMA50 Dist metric to identify when a stock is "stretched" too far from its moving average relative to its daily volatility.

The Strat: 3-2D Setup Label + Entry, Target & AlertsThis is an indicator that identifies the 3-2D setup based on TheStrat & will alert you if you have this on the chart. Once the 3-2D setup happens this will give you the entry, target and price labels. You can change the font size, label colors and add optional alerts.

TiRadarHUD Radar that provids for the ability to input manual levels in addition to tracking multiple EMAs.

GEMINI Advanced SMA with Trend & AlertsDescription:
This indicator is a professional Trend & Signal analysis tool designed to help traders identify market direction, entries, and momentum strength at a glance. It combines a customizable dual Moving Average system with an advanced real-time Information Dashboard.
The script is built to keep charts clean while providing maximum data through the on-screen panel.
📈 Key Features
1. Dual Moving Average System
Fast MA (Signal Line): Acts as the primary trigger for entries.
Slow MA (Trend Baseline): Filters the overall market direction.
Visual Cloud: The area between the two MAs is filled with color (Green/Red) to visualize the trend strength and potential support/resistance zones.
Flexibility: You can choose between SMA, EMA, HMA, WMA, or RMA for both lines independently.
2. Professional Data Dashboard A customizable table positioned on your chart provides real-time analytics:
Price Action: Immediate Bullish/Bearish status.
MA Status: Shows if the Fast and Slow MAs are currently Rising or Falling.
Exact Levels: Displays the precise price values of the MAs.
Spread Analysis: Monitors the gap between the Fast and Slow MA ("Expanding" vs "Squeezing") to help identify momentum acceleration or exhaustion.
3. Signals & Alerts
BUY Signal: Generated when the Price crosses OVER the Fast MA.
SELL Signal: Generated when the Price crosses UNDER the Fast MA.
Alerts: Fully compatible with TradingView alerts for automation.
4. Multi-Timeframe (MTF) Support You can calculate the Moving Averages based on a higher timeframe (e.g., viewing 4-hour MAs while trading on a 15-minute chart) to stay aligned with the macro trend.
🛠 How to Use
Trend Identification: Look at the "Cloud" color. Green indicates an uptrend context; Red indicates a downtrend context.
Entry Points: Use the "BUY" and "SELL" labels.
Pro Tip: Take BUY signals only when the Cloud is Green (trading with the trend).
Pro Tip: Take SELL signals only when the Cloud is Red.
Momentum Check: Use the Dashboard to see if the Spread is "EXPANDING" (strong momentum) or "SQUEEZING" (potential consolidation or reversal).
⚙️ Settings
Fast/Slow Length & Type: Fully customizable periods and MA types.
MTF: Enable/Disable higher timeframe calculations.
Dashboard: You can toggle the table visibility, change its size (Tiny, Small, Normal, Large), and move it to any corner of the screen.
Disclaimer: This tool is for informational purposes only and does not constitute financial advice.

Price Prediction Forecast ModelPrice Prediction Forecast Model
This indicator projects future price ranges based on recent market volatility.
It does not predict exact prices — instead, it shows where price is statistically likely to move over the next X bars.
How It Works
Price moves up and down by different amounts each bar. This indicator measures how large those moves have been recently (volatility) using the standard deviation of log returns.
That volatility is then:
Projected forward in time
Scaled as time increases (uncertainty grows)
Converted into future price ranges
The further into the future you project, the wider the expected range becomes.
Volatility Bands (Standard Deviation–Based)
The indicator plots up to three projected volatility bands using standard deviation multipliers:
SD1 (1.0×) → Typical expected price movement
SD2 (1.25×) → Elevated volatility range
SD3 (1.5×) → High-volatility / stress range
These bands are based on standard deviation of volatility, not fixed probability guarantees.
Optional Drift
An optional drift term can be enabled to introduce a long-term directional bias (up or down).
This is useful for markets with persistent trends.

rosh Swift ALGO-X based on ema for xauusd scalping use with original settings, assured 100 pips per day

ICT ORB Killzones by MaxN (15 / 30m)Trading session open/close with first 15/30 min orbs
will just have to adjust time zones to your current time line
GMT +0
I use
Asia 23.00 - 06.00
London 07.00 - 16.00
New York 12.00 - 22.00

4MA / 4MA[1] Forward Projection with 4 SD Forecast Bands4MA / 4MA Projection + 4 SD Bands + Cross Table is a forward-projection tool built around a simple moving average pair: the 4-period SMA (MA4) and its 1-bar lagged value (MA4 ). It takes a prior MA behavior pattern, projects that structure forward, and wraps the projected mean path with four Standard Deviation (SD) bands to visualize probable future price ranges.
This indicator is designed to help you anticipate:
Where the MA structure is likely to travel next
How wide the “expected” future price corridor may be
Where a future MA4 vs MA4 crossover is most likely to occur
When the real (live) crossover actually prints on the chart
What you see on the chart
1) Live moving averages (current market)
MA4 tracks the short-term mean of price.
MA4 is simply the previous bar’s MA4 value (a 1-bar lag).
Their relationship (MA4 above/below MA4 ) gives a clean, minimal read on trend alignment and directional bias.
2) Projected MA path (forward curve)
A forward “ghost” of the MA structure is drawn ahead of price. This projected curve represents the indicator’s best estimate of how the moving average structure may evolve if the market continues to rhyme with the selected historical behavior window.
3) 4 Standard Deviation bands (predictive future price ranges)
Surrounding the projected mean path are four SD envelopes. Think of these as forecast corridors:
Inner bands = tighter “expected” range
Outer bands = wider “stress / extreme” range
These bands are not a guarantee—rather, they’re a structured way to visualize “how far price can reasonably swing” around the projected mean based on observed volatility.
4) Vertical projection lines (most probable cross zone)
Within the projected region you’ll see vertical lines running through the bands. These lines mark the most probable zone where MA4 and MA4 are expected to cross in the projection.
In plain terms:
The projected MAs are two curves.
When those curves are forecasted to intersect, the script marks the intersection region with a vertical line.
This gives you a forward “timing window” for a potential MA shift.
5) Cross Table (top-right)
The table is your confirmation layer. It reports:
Current MA4 value
Current MA4 value
Whether MA4 is above or below MA4
The most recent BUY / SELL cross event
When a real, live crossover happens on the actual chart:
It registers as BUY (MA4 crosses above MA4 )
Or SELL (MA4 crosses below MA4 )
…and the table updates immediately so you can confirm the event without guessing.
How to use it
Practical workflow
Use the projected SD bands as future range context
If price is projected to sit comfortably inside inner bands, the market is behaving “normally.”
If price reaches outer bands, you’re in a higher-volatility / stretched scenario.
Use vertical lines as a “watch zone”
Vertical lines do not force a trade.
They act like a forward “heads-up”: this is the most likely window for an MA crossover to occur if the projection holds.
Use the table for confirmation
When the crossover happens for real, the table is your confirmation signal.
Combine it with structure (support/resistance, trendlines, market context) rather than trading it in isolation.
Notes and best practices
This is a projection tool: it helps visualize a structured forward hypothesis, not a certainty.
SD bands are best used as forecast corridors (risk framing, range planning, and expectation management).
The table is the execution/confirmation layer: it tells you what the MAs are doing now.

Lot Size Calculator (Entry + SL) GOLDLot Size Calculator (Entry + SL)
This indicator helps traders calculate the correct position size (lots) based on risk management, using a fixed account balance and risk percentage per trade.
By providing an Entry Price and Stop-Loss Price, the script automatically computes:
Dollar risk per trade
Stop-loss distance
Risk per unit
Total position size in units
Final position size in lots (rounded to broker-compatible steps)
How It Works
Define your Account Balance.
Set your Risk % per trade (e.g., 1%).
Choose your Entry Price:
Manual input, or
Use the current market price.
Enter your Stop-Loss Price.
The indicator calculates the maximum lot size so that your loss at SL equals your predefined risk.
Key Features
Uses TradingView’s syminfo.pointvalue for accurate instrument pricing
Supports any market (Forex, indices, commodities, crypto)
Custom units per lot (FX standard, mini, micro, or custom CFD contracts)
roker-friendly lot rounding
Clean table display for quick decision-making
Ideal for traders who:
Follow strict fixed-percentage risk management
Want consistent position sizing
Trade multiple instruments with different contract sizes
This tool ensures every trade risks the same percentage of capital, regardless of stop-loss distance.

Gold Asia Session Highlighter [IST]Here is a polished description and guide for your Gold Asia Session Highlighter. You can use this text for a YouTube description, a Telegram post, or a PDF guide to explain the tool to others.
Gold Asia Session Highlighter (IST) | Visual Indicator
This is a custom TradingView indicator designed to simplify the Gold Asia Strategy. Instead of automating trades, this tool purely handles the visuals. It automatically highlights the correct Asia Session time window (adjusting for Winter/Summer hours) and marks the exact points where you should draw your Fixed Range Volume Profile (FRVP) tool.
Perfect for: Traders who prefer to draw their own FRVP levels manually but want to ensure they are using the exact, error-free time range every single day.
Features
✅ Automatic Time Zone: Strictly calculated using IST (Indian Standard Time), so you don't need to convert time zones manually.
✅ Smart Season Detection: Automatically switches between Winter Session (04:30 – 06:25) and Summer Session (03:30 – 05:25) based on the current month.
✅ Visual Guidance: Highlights the session background and places "START" and "END" labels on the exact candles.
✅ Zero Clutter: Clean visuals with no moving averages or strategy lines—just the session box.
How to Use It
Add to Chart: Apply the script to your Gold (XAUUSD) 5-minute chart. You will see a blue highlighted box appear during the Asia session.
Locate the Labels:
Look for the blue START label (bottom of the candle).
Look for the red END label (top of the candle).
Draw Your FRVP:
Select the Fixed Range Volume Profile tool from your TradingView toolbar.
Click exactly on the START candle.
Drag and release exactly on the END candle.
Trade: You now have the exact Value Area High (VAH), Value Area Low (VAL), and Point of Control (POC) for the day. Use your breakout strategy as usual!

Volume + VWAP + Prior Session Levels DashboardVolume Spike + VWAP + Session Levels Dashboard
This indicator is a real-time market context dashboard designed to help traders quickly understand participation, value, and key reference levels without cluttering the chart with multiple indicators.
Instead of plotting lines or signals, the script summarizes critical intraday information into a compact on-chart table, allowing traders to make faster, more informed decisions based on how active the market is, where fair value is, and where important reference levels exist.
Core Concepts Used
This script is built on three widely used market principles:
Relative Volume Participation
Volume-Weighted Average Price (VWAP)
Prior Session Reference Levels
The indicator does not attempt to predict direction. Its purpose is to provide objective context that traders can combine with their own strategies.
How the Indicator Works
1. Volume Spike Analysis (Relative Volume)
Rather than showing raw volume, the script measures how unusual the current bar’s volume is compared to recent activity.
A moving average of volume is calculated using a user-defined lookback period.
Current volume is divided by this average to produce a volume multiple (for example, 2.0× normal volume).
This multiple is translated into a descriptive strength label, ranging from Below Threshold to Legendary.
This approach helps traders immediately recognize when participation is significantly above normal, which often coincides with institutional activity, breakouts, or important reactions near key levels.
2. Daily VWAP (Current and Prior Day)
VWAP (Volume-Weighted Average Price) represents the average price traded, weighted by volume, and is commonly used as a measure of fair value.
This script calculates VWAP internally by:
Accumulating price × volume throughout the day
Dividing by total volume
Automatically resetting at the start of each new trading day
The dashboard displays:
Current day VWAP – real-time session fair value
Prior day VWAP – an important reference from the previous session
Traders often use these levels to evaluate whether price is trading at a premium, discount, or near equilibrium.
3. Previous Day High and Low
The indicator also displays:
Previous day high
Previous day low
These levels frequently act as liquidity targets, support/resistance zones, or reaction points, especially during intraday trading sessions.
Dashboard Design
All information is presented in a two-column dashboard showing:
Metric name
Current value or status
The dashboard can be positioned in any corner of the chart and updates in real time, allowing traders to maintain awareness without constantly switching indicators or timeframes.
How to Use This Indicator
This script is best used as a decision-support tool, not a standalone trading system.
Typical uses include:
Identifying abnormally high volume near important price levels
Evaluating price position relative to VWAP
Monitoring reactions around prior day highs and lows
Staying oriented during fast market conditions without chart clutter
The indicator works on any timeframe and adapts automatically to the instrument’s trading session.
Customization Options
Users can:
Adjust the volume moving average length to define what “normal” volume means
Choose the price source used for VWAP calculation
Change the dashboard’s on-screen position
Summary
The Volume Spike + VWAP + Session Levels Dashboard provides a clear, objective snapshot of market conditions by combining participation, value, and reference levels into a single visual tool. It is designed to help traders answer a simple but critical question:
“Is the market doing something meaningful right now — and where?”
This indicator focuses on context, clarity, and usability for traders who want insight without unnecessary complexity.


BK AK-Warfare Formations👑 BK AK-Warfare Formations — Form the pride. Take the high ground. Strike with wisdom. 👑
Built for traders who think like commanders: see the formation, plan the maneuver, execute the strike.
🎖️ Full Credit (Engine + Logic — Trendoscope)
Original foundation (Trendoscope Auto Chart Patterns):
The entire pattern engine (multi-zigzag scanning, pivot logic, trendline-pair validation, geometric classification, drawing framework, overlap handling, and pattern caps) is by Trendoscope—one of the best coders on TradingView and the creator of this indicator’s core.
I’m not rewriting his war machine. I’m upgrading the interface and tactical readability so you can see structure faster and act cleaner.
🧩 BK Enhancements (on top of Trendoscope)
Built for clarity under pressure:
Short-form formation tags so your chart stays readable (AC/DC/RC/RWE/FWE/CT/DT/etc.)
Label transparency controls (text + background), including separate controls for short labels
Hover tooltips (toggle): hover a label to see the full pattern name + bias (Bullish/Bearish/Neutral)
Alerts upgraded with bias + category filtering (Channel / Wedge / Triangle)
Pattern border extension (optional): extends the two boundary lines forward by N bars so the battlefield edges stay visible (not extending random zigzag legs)
Everything else remains Trendoscope’s architecture and detection logic.
🧠 What It Does
Auto-detects and labels:
Channels
AC — Ascending Channel
DC — Descending Channel
RC — Ranging Channel
Wedges
RWE / FWE — Rising/Falling Wedge (Expanding)
RWC / FWC — Rising/Falling Wedge (Contracting)
Triangles
ATC / DTC — Asc/Desc Triangle (Contracting)
ATE / DTE — Asc/Desc Triangle (Expanding)
CT — Converging Triangle
DT — Diverging Triangle
You get clean battlefield tags (short codes) and optional hover briefings (full name + bias) without clutter.
🧭 How It Detects (So You Know It’s Not Random)
Trendoscope’s engine does this in a disciplined sequence:
Multi-Zigzag Sweep
Multiple zigzag levels scan the same market from different swing sensitivities.
Pivot Structure Validation (5 or 6 pivots)
A formation is only valid when pivot sequencing produces a legit trendline pair.
Trendline-Pair Rules
Upper boundary anchors to pivot highs
Lower boundary anchors to pivot lows
Geometry is measured (parallel / converging / diverging) to classify channel vs wedge vs triangle
Optional quality filters reduce warped/low-quality shapes (bar ratio checks, overlap avoidance, max pattern caps)
You’re not getting “art.” You’re getting validated geometry.
⚙️ Core Controls (What You Actually Tune)
Zigzag length/depth per level: swing sensitivity (faster vs cleaner)
Pivots used (5 or 6): tighter vs broader structures
Error/Flat thresholds: tolerance + what qualifies as “flat”
Avoid overlap: prevents stacking junk on top of junk
Max patterns: keeps the chart from becoming noise
Label system: short codes, transparency, tooltips, bias visibility
Border extension: projects the structure edges forward for planning
🗺️ Read the Battlefield (Tactical Translation)
AC (Ascending Channel): trend carry; buy pullbacks to the lower wall, manage risk outside structure
DC (Descending Channel): late down-leg; watch for momentum shift + reclaim = tactical reversal zone
RWE (Rising Wedge): distribution bias; break + failed retest is where weakness shows
CT / DT (Triangles): compression → expansion; plan edges, not the middle
Structure is the map. Bias is the compass. Your risk plan is the sword.
🧑🏫 Mentor A.K. (Respect Where It’s Due)
A.K. is the discipline behind this project.
Patience. Clean execution. No gambling. No chasing.
His standard is in every choice: reduce noise, sharpen structure, force clarity.
This is why the labels are tight, the tooltips are direct, and the features serve execution—not ego.
🤝 Give Forward (The Code of the Camp)
If this indicator sharpens your edge:
Teach one trader how to read structure with discipline (not hype)
Share process, not just screenshots (entries, invalidation, management)
If you build on open work, credit loudly and improve responsibly
A king builds men. A lion builds courage. A camp survives because knowledge moves forward.
👑 King Solomon’s Standard
This is warfare—market warfare—so we move by wisdom, not emotion:
“By wise counsel you will wage your own war, and in a multitude of counselors there is safety.” — Proverbs 24:6
BK AK-Warfare Formations — where formation meets judgment, and judgment meets execution.
Gd bless. 🙏

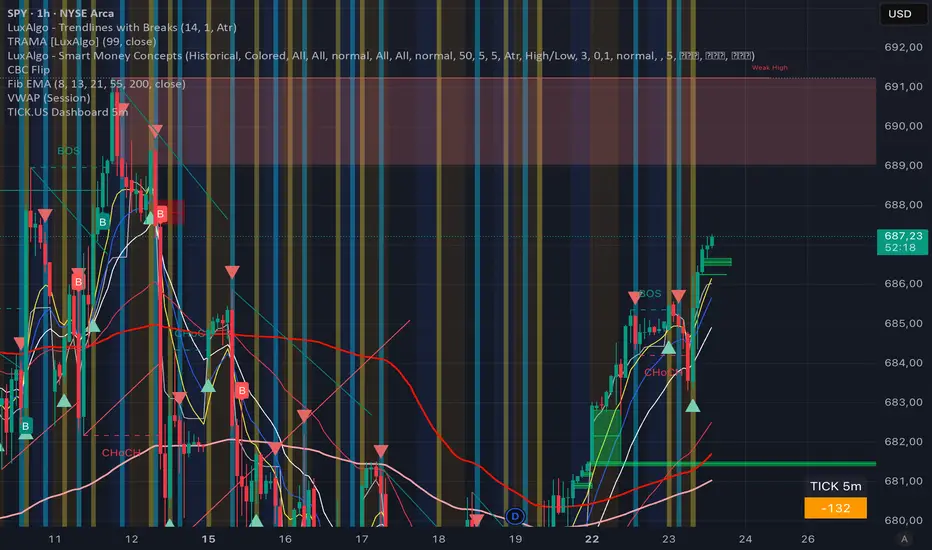
TICK.US Dashboard 5mIt's a very simple script, It displays the TICK.US Timeframe 5 mn on your template
Momentum Echo Oscillator [Community Edition]Concept: The Momentum Echo Oscillator (MEO) is a modern take on classical momentum oscillators. Most indicators only look at the "now". MEO introduces the concept of Momentum Echoes—historical momentum harmonics that are weighted and blended back into the current price velocity.
Why use MEO? Standard momentum tools (like ROC or RSI) can be very "jittery" or noisy. By integrating historical echoes, MEO provides a smoother, more rhythmic representation of price flow, making it easier to spot genuine trend reversals.
Key Elements:
Primary Momentum: The immediate speed of price.
Echo Harmonics: Two adjustable lookback points that act as a "memory" for the indicator, filtering out false breakouts.
Dynamic Histogram: Visualizes the gap between the Echo Engine and the Trigger Line, highlighting acceleration and deceleration.
Settings:
Echo Weight: Adjust how much "memory" you want the indicator to have.
Smoothing: Clean up the signals for higher timeframes.
This is an open-source tool for the TradingView community. Enjoy!

TSF - Rel Vol & Stop calcSimple swing data table showing:
1. Avg 20D dollar vol
2. Live dollar vol
3. Live % relative vol compared to avg 20d daily vol
4.Percent to LOD current price with color codes
5. Avg 20d ATR%


SMA Crossover Strategy with Monte Carlo TunerCore logic
• Two signals:
• FAST SMA
• SLOW SMA
• Trade rule:
• FAST > SLOW → long
• FAST < SLOW → short
• Nothing else. No indicators stacked on top.
⸻
Two operating modes
1) Deterministic mode (baseline)
• MC = OFF
• You choose (fast, slow) explicitly (default 8/34)
• Behavior is stationary and repeatable
This is your control experiment.
⸻
2) Monte Carlo mode (adaptive discovery)
• MC = ON
• The script:
• Samples (fast, slow) pairs randomly from bounded integer ranges
• Simulates trades for each pair in parallel
• Tracks (gross profit, gross loss, trade count)
• Computes PF = GP / GL
• Promotes best-so-far online
Key point:
This is not grid search. It’s stochastic sampling with early stopping with time control (default 35 s)

#BLTA - CARE 7891🔷 #BLTA - CARE 7891 is an overlay toolkit designed to support structured trading preparation and chart reading. It combines a manual Trade Box + Lot Size/Risk panel, session background highlights (NY time), confirmed Previous Day/Week High-Low levels, an Asian range liquidity box, a 1H ZigZag market-structure projection, and an imbalance map (FVG / OG / VI) with an optional dashboard.
This script is an indicator (not a strategy). It does not place orders and is intended for planning, risk visualization, and market context.
✅ Main Modules
1) 💸 Risk Module (Trade Box + Lot Calculation + Table)
A complete manual trade-planning tool:
Pick an Entry Point (EP) and Stop Loss (SL) directly on the chart using input.price(..., confirm=true).
Automatically calculates:
Cash at Risk
SL distance (pips) (Forex-aware)
Lot size based on your:
Account balance
Risk %
Units per lot
Account base currency (with conversion if needed)
Draws:
Risk box (EP ↔ SL)
Target box (RR-based TP)
Displays a clean table panel with the key values.
🔁 Re-confirm Mode (Wizard)
Use “Re-confirm Trade Box Points” to force a clean logical reset and re-pick EP/SL/time anchors:
Shows temporary EP/SL labels
Shows a small wizard table guiding you step-by-step
Turn it OFF to return to normal risk table + boxes
Tip: If your chart timeframe changes or you want a fresh selection, Re-confirm mode is the safest way to reset everything cleanly.
2) 🎨 Session Visualization (New York Time)
Highlights chart background for these windows:
Day Division (17:00–17:01 NY)
London (03:00–05:00 NY) + sub-windows
New York (08:00–10:30 NY) + sub-windows
Colors are fully configurable from inputs.
3) 📰 Confirmed PDH/PDL (Previous Days)
Optional module that plots confirmed Previous Day High (PDH) and Previous Day Low (PDL):
Trading day is defined as 17:00 → 17:00 NY
Lines start exactly at the candle where the high/low occurred
Lines extend forward and can freeze when price touches them
Configurable: days to keep, style, width, and “stop on hit”
4) 📅 Confirmed Weekly High/Low (Previous Weeks)
Optional module that plots confirmed Weekly High/Low:
Confirmation occurs at Sunday 17:00 NY (typical FX week boundary)
Lines begin at the candle where the weekly extremes formed
Extends forward and can freeze on touch
Configurable: weeks to keep, style, width, stop-on-hit
5) 🈵 Asian Range Liquidity Box
Draws a session box that tracks high/low and optional midline (50%):
Uses New York time
Dynamic updates while session is active
Optional mid label and configurable line style/width
6) 📈 Market Structure - ZigZag (1H projected)
A ZigZag structure engine calculated on 1H and projected onto any timeframe:
Configurable:
Length
Source type (High/Low or Open/Close)
Colors and width
Opacity when viewing non-1H charts
Optional live extension of the last leg
Includes safe cleanup when toggling OFF (no leftover objects)
7) 📊 Imbalance Detector (FVG / OG / VI) + Dashboard
Detects and draws:
Fair Value Gaps (FVG)
Opening Gaps (OG)
Volume Imbalances (VI)
Optional dashboard shows frequencies and fill rates.
Attribution / Credits
This module is inspired by / adapted from the public concept widely known as “Imbalance Detector” (LuxAlgo-style logic). This script is independently packaged and integrated as part of the toolkit with additional modules and custom structure.
⚙️ How to Use (Quick Steps)
Add the indicator to the chart (overlay).
Enable 💸 Risk Module if you want trade planning.
Go to Trade Box Location and pick:
Entry Point (EP)
Stop Loss (SL)
Time anchors for box edges
Adjust:
Account balance, risk %, units per lot, RR target
Enable additional modules as needed:
Session backgrounds
PDH/PDL
Weekly High/Low
Asian range box
ZigZag
Imbalances + dashboard
🔎 Notes & Limitations
This script is for visual planning and context, not trade execution.
Lot sizing is based on the selected EP/SL and your inputs; always double-check broker rules, symbol specifications, and contract size.
Object-heavy features (boxes/lines/tables) may increase load on lower-end devices or very small timeframes.

Watchlist Auto Buy/Sell AlertsTrial for the best. This indicator is built to assess the chart and make it easier for traders to identify coins that are available for trading and minimize losses.

ICT ORB Killzones by MaxN (15 / 30m)Trading session London, Asia, New York
orb 15/30 min selectable breakout zones with buy/sell signals
