Dynamic Trend-Based Fibonacci Extension💡 This indicator is a sophisticated, automated technical analysis tool designed to identify high-probability trend continuation setups using the principles of market structure and Fibonacci geometry. By algorithmically detecting "A-B-C" price structures (Pivot -> Impulse -> Retracement), it projects dynamic Fibonacci Extension levels to forecast potential price targets for the next impulsive move (Wave C to D). Unlike static drawing tools, this script adapts to market volatility and features an advanced invalidation engine to keep your charts clean and your risk managed.
✨ Originality and Utility
Traders often struggle with the subjectivity of drawing Fibonacci extensions manually. This script solves that by standardizing the identification of market structure using a proprietary ZigZag algorithm enhanced with Average True Range (ATR) for volatility-adjusted sensitivity.
Key unique features include:
Automated Structure Detection: Instantly spots Bullish (Higher High, Higher Low) and Bearish (Lower Low, Lower High) sequences without manual input.
Dynamic Invalidation: The script monitors price action in real-time. If price breaks the invalidation point (Point A), the structure is immediately "grayed out" or deleted, preventing you from trading based on broken setups.
Golden Zone Targeting: Highlights the high-probability reversal zone between the 1.5 and 1.618 extensions, often associated with the completion of a measured move.
JSON Alerting: Built-in support for algorithmic trading with structured JSON payloads (Entry, TP, SL) ready for webhook integration.
🔬 Methodology and Concepts
The core logic operates on a three-step algorithmic sequence:
1. Pivot Identification: The script uses a "ZigZag" approach to find significant swing highs and lows. It employs an ATR-based threshold (or fixed deviation) to filter out market noise, ensuring only significant structural points are considered.
2. Geometric Validation: It evaluates the last three pivot points (A, B, C) to confirm a valid trend structure.
Bullish Setup: Point C must be higher than Point A but lower than Point B (a valid retracement).
Bearish Setup: Point C must be lower than Point A but higher than Point B.
3. Projection Mathematics: Once a valid ABC structure is locked, the script calculates extension targets using the standard formula: Target = Price C + ((Price B - Price A) * Ratio) . It also supports Logarithmic Scale calculations for assets with exponential growth, such as cryptocurrencies, ensuring proportional accuracy over large price ranges.
🎨 Visual Guide
The indicator paints a clear, detailed roadmap on your chart. Here is how to interpret the visual elements:
● Structure Lines
Solid Line (A to B): Represents the initial "Impulse" leg of the move.
Dashed Line (B to C): Represents the "Retracement" or corrective leg.
Green Structures: Indicate Bullish setups (looking for long entries).
Red Structures: Indicate Bearish setups (looking for short entries).
Gray/Dimmed Structures: These are invalidated setups where the price has breached the Stop Loss level (Point A).
● Extension Levels (Targets)
The script projects the following key Fibonacci ratios extending from Point C:
0.618 (Wave 5): An early profit-taking level, often corresponding to a truncated 5th wave.
1.0 (Measured Move): Where the extension equals the length of the initial impulse (AB = CD pattern).
1.272 (Harmonic): A common extension level for corrective structures or deep pullbacks.
Golden Zone (1.5 - 1.618): A highlighted fill area. The 1.618 level (Solid Line) is the "Golden Ratio" and is statistically one of the most significant targets in trending markets, often labeled as "Wave 3".
● Labels
Points A, B, C: Clearly marks the swing points defining the structure.
Right-Side Labels: Display the Ratio (e.g., 1.618) and the exact Price Level for easy order placement.
📖 How to Use
This tool is best used as a trend-following system.
1. Trend Identification
Wait for a new Solid Colored Structure (Green or Red) to appear. This confirms that a valid ABC retracement has occurred.
2. Entry Strategy
The "Trigger" is generally the reversal from Point C. Aggressive traders enter near C, while conservative traders may wait for a breakout above B.
Stop Loss: Place your SL just beyond Point A . If price breaks A, the script will automatically gray out the structure, signaling invalidation.
3. Profit Taking
Use the projected extension lines as dynamic Take Profit (TP) zones:
TP1: 1.0 (The Measured Move).
TP2: The Golden Zone (1.5 to 1.618). This is often the strongest target for a Wave 3 impulsive move.
4. Automation
For automated traders, create an alert using the "Any alert() function call" option. The script outputs a JSON string containing the Action, Ticker, Entry Price, TP (1.618), and SL (Point A).
⚙️ Inputs and Settings
You can fully customize the script to fit your asset class and timeframe:
● ZigZag Detection
Pivot Lookback Depth: (Default: 5) Determines how many bars to check left/right for a pivot. Higher numbers find larger, more significant structures.
Use ATR-Based Threshold: (Default: True) Adapts the sensitivity to market volatility.
ATR Multiplier: (Default: 2.0) Adjusts how much price must reverse to form a new leg.
● Structure Invalidation
Enable Structure Invalidation: (Default: True) Toggles the logic that checks if Point A is breached.
Invalidation Action: Choose "Gray Out" to keep history visible but dimmed, or "Delete" to remove failed setups entirely.
● Fibonacci Settings
Use Logarithmic Scale: Essential for crypto or long-term timeframe analysis.
Show 0.618 / 1.0 / 1.272 / 1.618: Toggles individual levels on/off to declutter the chart.
Extend Lines Right: Extends the target lines into the future for better visibility.
● Display Settings
Keep Last N Structures: Controls how many historical structures remain on the chart to prevent visual clutter.
Show Elliott Wave Labels: Adds theoretical wave counts (e.g., "Wave 3") to the ratio labels.
🔍 Deconstruction of the Underlying Scientific and Academic Framework
This indicator is grounded in Fractal Market Geometry and Elliott Wave Theory .
1. The Golden Ratio (Phi - 1.618):
Mathematically derived from the Fibonacci sequence, the 1.618 ratio is omnipresent in natural growth patterns. In financial markets, it represents the psychological "tipping point" of crowd behavior during an impulsive trend. This script emphasizes the 1.618 extension as the primary target for a "Wave 3," which is academically cited as typically the longest and strongest wave in a 5-wave motive sequence.
2. Harmonic AB=CD Patterns:
The inclusion of the 1.0 extension validates the "Measured Move" concept. Statistically, markets often move in symmetrical legs where the secondary impulse (CD) equals the magnitude of the primary impulse (AB).
3. Volatility Normalization (ATR):
By utilizing the Average True Range (ATR) for pivot detection, the script adheres to statistical volatility normalization. This ensures that the structures identified are statistically significant relative to the asset's current volatility regime, rather than relying on arbitrary percentage moves which fail across different asset classes.
⚠️ Disclaimer
All provided scripts and indicators are strictly for educational exploration and must not be interpreted as financial advice or a recommendation to execute trades. I expressly disclaim all liability for any financial losses or damages that may result, directly or indirectly, from the reliance on or application of these tools. Market participation carries inherent risk where past performance never guarantees future returns, leaving all investment decisions and due diligence solely at your own discretion.
Rozszerzenie Fibonacciego

Auto Fibonacci Lines Depending on ZigZag %In the world of technical analysis, few tools are as powerful—or as misused—as Fibonacci Retracements. The Auto Fibonacci Lines Depending on ZigZag % is not just an indicator; it is a complete, automated trading system designed to eliminate subjectivity and bring institutional-grade precision to your charts.
This script automates the identification of significant market structures using a ZigZag algorithm. Once a market swing is mathematically confirmed (based on your deviation settings), it instantly projects a complete suite of Retracement and Extension levels. This allows you to stop guessing where to draw your lines and start focusing on price action.
🧠 The Logic Behind the Indicator
Understanding how your tools work is the first step to trusting them. This script operates on a three-step logic loop:
ZigZag Identification:
The script continuously monitors price action relative to the last known pivot point. It uses a user-defined Deviation % to filter out market noise. A new "Leg" is only confirmed when price reverses by this specific percentage. This ensures that the Fibonacci lines are only drawn on significant market moves, not random chop.
Automated Anchor Points:
Once a downward trend is confirmed (e.g., price drops 30% from the top), the script automatically anchors the Fibonacci tool to the Swing High (Start) and the Swing Low (End). It does this without you needing to click or drag anything.
Dynamic Cleanup:
Markets evolve. A key feature of this script is its self-cleaning mechanism. As soon as a new trend leg is confirmed, the script automatically deletes the old, invalidated Fibonacci lines and draws a fresh set for the new structure. This keeps your chart clean and focused on the now.
🎓 How to Trade This System
This indicator is color-coded to simplify your decision-making process. It moves beyond standard "rainbow" charts by categorizing price levels into three distinct actionable zones.
1. The "Reload Zone" (White Lines: 0.618 - 0.786) ⚪
Role: High-Probability Support / Entry
In institutional trading, the 0.618 (Golden Ratio) to 0.786 region is often where algorithms step in to defend a trend.
Why it works : This is the "discount" area where smart money re-accumulates positions before the next leg up.
2. The "Decision Wall" (Blue Lines: 1.382 - 1.5) 🔵
Role: Strong Resistance / Trend Check
This is a unique feature of this suite. The 1.382 and 1.5 levels often act as a "ceiling" for weak breakouts.
Strategy : If you entered in the White Zone, the Blue Zone is your first major hurdle. If price stalls here, consider securing partial profits.
Warning : A rejection from the Blue Lines often leads to a double-top formation. However, a clean break above the Blue Lines usually signals a parabolic move is beginning.
3. The "Extension Zone" (Yellow, Red, Purple > 1.618) 🟡🔴
Role : Take Profit / Exhaustion
Levels above 1.5 (starting with the 1.618 Golden Extension) are statistical extremes.
Strategy : These are Strict Take Profit levels. Do not FOMO (Fear Of Missing Out) into new long positions here. The probability of a reversal increases drastically as price climbs through these levels (2.618, 3.618, 4.618).
📐 The Mathematical Edge: Logarithmic vs. Linear
One of the most critical features of this script is the ability to toggle between Logarithmic and Linear calculations.
Why use Logarithmic?
If you are trading Crypto (Bitcoin, Altcoins) or high-growth Tech Stocks, linear Fibonacci levels are mathematically incorrect over large moves. A 50% drop from $100 is different than a 50% drop from $10.
This script calculates the percentage difference (Log Scale), ensuring your targets are accurate even during 100%+ parabolic runs.
Why use Linear?
For mature markets like Forex (EURUSD) or Indices (SPX500) where volatility is lower, Linear scaling is the industry standard.
🛠️ Configuration & Best Practices
Deviation % : This is the heartbeat of the indicator.
Swing Trading : Set to 20-30%. This filters out noise and only draws Fibs on major macro moves.
Scalping : Set to 3-5%. This will catch smaller intraday waves.
Text Place : Keeps your chart clean by pushing labels to the right, ensuring they don't overlap with the current price action.
👤 Who Is This Indicator For?
The Disciplined Trader : Who wants to remove emotional bias from their charting.
The Crypto Investor : Who needs accurate Logarithmic targets for long-term holding.
The Confluence Trader : Who combines these automated levels with Order Blocks, RSI, or Volume to find the perfect entry.
⚠️ RISK DISCLAIMER & TERMS OF USE
For Educational Purposes Only:
This script and the strategies described herein are provided strictly for educational and informational purposes. They do not constitute financial, investment, or trading advice. The "Auto Fibonacci Lines" indicator is a tool for technical analysis and should not be used as the sole basis for any trading decision.
No Guarantees:
Past performance of any trading system or methodology is not necessarily indicative of future results. Financial markets are inherently volatile, and trading involves a high level of risk. You could lose some or all of your capital.
User Responsibility:
By using this script, you acknowledge that you are solely responsible for your own trading decisions and risk management. The author assumes no liability for any losses or damages resulting from the use of this tool or the information provided. Always consult with a qualified financial advisor before making investment decisions.

NYC Midnight Fedwire + Fibonacci [Takeda Trades 2026]NYC Midnight Fedwire + Fibonacci
by TakedaTradesOfficial
v1 01/09/2026
═══════════════════════════════════════════════════════════════
NYC MIDNIGHT FEDWIRE + FIBONACCI INDICATOR - COMPLETE TRADING GUIDE
═══════════════════════════════════════════════════════════════
WHAT THIS INDICATOR DOES
This is the ULTIMATE NYC Midnight indicator that combines:
1. Multiple NYC session hour ranges (not just Hour 1)
2. Fibonacci extension zones (10 graded levels from Golden Zone to Expert)
3. Federal Reserve Fedwire hours (08:30-09:30 and 09:30-16:00)
4. Smart midline cross detection (shows exactly when price hits key levels)
Think of it as a professional institutional trading roadmap that shows you EXACTLY where the big money moves happen during the NYC session.
═══════════════════════════════════════════════════════════════
THE FOUR HOUR RANGES EXPLAINED
This indicator tracks FOUR critical time periods during the NYC session:
HOUR 1: NYC MIDNIGHT (00:00-01:00 EST) - Yellow
• What it is: The most important hour - sets the daily range
• Why it matters: This is when Asia hands off to London
• What happens: Low liquidity, big players establish positions
• Trade quality: ⭐⭐⭐⭐⭐ FOUNDATION OF THE DAY
HOUR 2: LONDON OPEN (01:00-02:00 EST) - Gray
• What it is: First hour after midnight, early London activity
• Why it matters: London traders react to Hour 1 range
• What happens: Volatility picks up, ranges often expand
• Trade quality: ⭐⭐⭐⭐
HOUR 3: FEDWIRE OPEN (08:30-09:30 EST) - Blue
• What it is: Federal Reserve Fedwire system opens
• Why it matters: Banks settle large institutional transfers
• What happens: News releases (8:30 EST), pre-NY volatility
• Trade quality: ⭐⭐⭐⭐⭐ MAJOR MOVES
HOUR 4: NY OPEN TO CLOSE (09:30-16:00 EST) - Purple
• What it is: Full US stock market hours
• Why it matters: Maximum liquidity, all markets active
• What happens: Trends develop, Hour 1 levels get tested
• Trade quality: ⭐⭐⭐⭐⭐ MAIN SESSION
═══════════════════════════════════════════════════════════════
FIBONACCI EXTENSION ZONES - THE GRADING SYSTEM
The indicator plots 10 FIBONACCI EXTENSION ZONES above and below Hour 1. Each zone represents a different "grade" of trading setup based on distance from the opening range.
The zones are calculated as multiples of the Hour 1 range:
GOLDEN ZONE (GZ) - 0.50x to 0.79x
• Distance: 50-79% of Hour 1 range
• Fibonacci levels: 0.618 (classic golden ratio area)
• Setup quality: ⭐⭐⭐⭐⭐ HIGHEST PROBABILITY
• Psychology: "Natural retracement zone"
• Color: Always yellow (sacred level)
GRADE D+ SETUP - 1.0x to 1.25x
• Distance: 100-125% of Hour 1 range
• Fibonacci levels: 1.0 to 1.25 extension
• Setup quality: ⭐⭐⭐
• Psychology: "Equal range move" - market doubling the range
• Risk: Moderate risk, smaller targets
GRADE C+ SETUP - 1.618x to 2.0x
• Distance: 162-200% of Hour 1 range
• Fibonacci levels: 1.618 to 2.0 extension
• Setup quality: ⭐⭐⭐⭐
• Psychology: "Golden extension" - major breakout territory
• Risk: Good risk/reward, reliable reversal zone
GRADE B+ SETUP - 2.618x to 3.0x
• Distance: 262-300% of Hour 1 range
• Fibonacci levels: 2.618 to 3.0 extension
• Setup quality: ⭐⭐⭐⭐
• Psychology: "Strong trend move" - momentum in play
• Risk: Higher targets, needs confirmation
GRADE A+ SETUP - 3.618x to 4.0x
• Distance: 362-400% of Hour 1 range
• Fibonacci levels: 3.618 to 4.0 extension
• Setup quality: ⭐⭐⭐⭐⭐
• Psychology: "Major breakout" - institutional level
• Risk: Excellent for reversals or continuation
S TIER SETUP (S+) - 4.618x to 5.0x
• Distance: 462-500% of Hour 1 range
• Fibonacci levels: 4.618 to 5.0 extension
• Setup quality: ⭐⭐⭐⭐⭐ ELITE
• Psychology: "Blow-off top/bottom" - extreme move
• Risk: Massive potential, rare occurrences
S++ TIER SETUP - 5.618x to 6.0x
• Distance: 562-600% of Hour 1 range
• Fibonacci levels: 5.618 to 6.0 extension
• Setup quality: ⭐⭐⭐⭐⭐ LEGENDARY
• Psychology: "Parabolic move" - news-driven or panic
• Risk: Once in a month opportunity
S+++ TIER SETUP - 6.618x to 7.0x
• Distance: 662-700% of Hour 1 range
• Fibonacci levels: 6.618 to 7.0 extension
• Setup quality: ⭐⭐⭐⭐⭐ MYTHIC
• Psychology: "Black swan event" - crash or spike
• Risk: Historical moves only
PROFESSIONAL SETUP (PRO) - 7.618x to 8.0x
• Distance: 762-800% of Hour 1 range
• Fibonacci levels: 7.618 to 8.0 extension
• Setup quality: ⭐⭐⭐⭐⭐ INSTITUTIONAL
• Psychology: "Central bank intervention level"
• Risk: Reserved for pros only
EXPERT LEVEL SETUP - 8.618x to 9.0x
• Distance: 862-900% of Hour 1 range
• Fibonacci levels: 8.618 to 9.0 extension
• Setup quality: ⭐⭐⭐⭐⭐ GOD TIER
• Psychology: "Market structure break" - paradigm shift
• Risk: Once in a year, career-defining trades
═══════════════════════════════════════════════════════════════
VISUAL MODES EXPLAINED
The indicator offers TWO visual modes to suit your trading style:
1. GOLDEN ZONES MODE (Default)
• All zones display in YELLOW
• Best for: Neutral analysis, seeing all levels equally
• Philosophy: "Every Fibonacci level is sacred"
• When to use: Range-bound markets, uncertainty
• Mental approach: "Let price tell me which way to trade"
2. GRADED SETUPS MODE
• Zones ABOVE Hour 1 high = RED (darker as grade increases)
• Zones BELOW Hour 1 low = GREEN/LIME (darker as grade increases)
• Golden Zone stays YELLOW (always sacred)
• Best for: Directional bias, visual clarity
• Philosophy: "Grade the quality of the move"
• When to use: Trending markets, breakout scenarios
• Mental approach: "I'm looking for specific grade setups"
Pro Tip: In Graded Setups mode, the S++ and S+++ zones are the DARKEST colors - they stand out visually when extreme moves happen.
═══════════════════════════════════════════════════════════════
HOW TO READ THE CHART
VISUAL ELEMENTS:
Yellow Box (Hour 1)
• Thick yellow border with vertical edges
• Shows the 00:00-01:00 EST range
• This is your anchor for the entire day
Black Lines
• Two solid black lines extending from Hour 1
• Top line: Open of the 00:00 candle
• Bottom line: Close of the 00:00 candle
• Purpose: Shows immediate directional bias
Orange Vertical Line
• Marks midnight (00:00 EST) - the daily reset
• This is where everything begins
Colored Hour Ranges
• Yellow: Hour 1 (00:00-01:00)
• Gray: Hour 2 (01:00-02:00)
• Blue: Hour 3 (08:30-09:30) - Fedwire open
• Purple: Hour 4 (09:30-16:00) - NY session
Fibonacci Zones
• Boxes with borders at the edges of Hour 1
• Background extends to current price
• Dashed midlines through each zone (key entry levels)
• Labels on the left showing grade (GZ, D+, C+, B+, A+, S+, etc.)
Midline Touch Labels
• Yellow labels appear when price touches zone midlines
• Shows "GZ", "C+", "S+", etc. (or emojis if enabled)
• These are your trade alerts
Candle Colors
• Yellow: During Hour 1 (00:00-01:00)
• Green: Above Hour 1 high (bullish territory)
• Red: Below Hour 1 low (bearish territory)
• Gray: Inside Hour 1 range (consolidation)
═══════════════════════════════════════════════════════════════
TRADING STRATEGIES - THE COMPLETE PLAYBOOK
STRATEGY 1: THE GOLDEN ZONE BOUNCE ⭐⭐⭐⭐⭐ Highest Win Rate
Concept: The Golden Zone (0.618-0.786) is the highest probability reversal area in all of trading.
LONG SETUP:
1. Hour 1 completes at 01:00 EST
2. Price moves DOWN toward the Golden Zone below Hour 1 low
3. Watch for midline touch (you'll see "GZ" label appear)
4. Entry: When price touches GZ midline + bullish candle pattern
5. Stop loss: Below the GZ zone (below the 0.50 level)
6. Target 1: Hour 1 midline
7. Target 2: Hour 1 high
8. Target 3: Opposite GZ zone (above Hour 1)
SHORT SETUP:
1. Hour 1 completes at 01:00 EST
2. Price moves UP toward the Golden Zone above Hour 1 high
3. Watch for midline touch (you'll see "GZ" label appear)
4. Entry: When price touches GZ midline + bearish candle pattern
5. Stop loss: Above the GZ zone (above the 0.79 level)
6. Target 1: Hour 1 midline
7. Target 2: Hour 1 low
8. Target 3: Opposite GZ zone (below Hour 1)
Best times to trade this:
• 02:00-05:00 EST (London session)
• 08:30-10:00 EST (NY open)
• After news releases
Win rate: 70-80% with proper confirmation
Risk/Reward: 1:3 minimum (targeting Hour 1 midline)
─────────────────────────────────────────────────────────────
STRATEGY 2: GRADE A+ / B+ / C+ REVERSALS ⭐⭐⭐⭐⭐ High Probability
Concept: When price extends 1.5-4x the Hour 1 range, it's overextended and due for a reversal.
The Setup:
1. Hour 1 range established
2. Price breaks out and reaches B+, A+, or even S+ zones
3. Wait for a midline touch (B+, A+, or S+ label appears)
4. Look for rejection signals:
• Long upper/lower wicks
• Doji or pin bar
• Engulfing pattern
• Volume spike
LONG ENTRY (at lower zones):
• Price in B+, A+, or S+ zone BELOW Hour 1 low
• Midline touch occurs
• Bullish reversal pattern
• Entry: Next candle open or break of reversal candle high
• Stop: Below the zone (tight 10-20 pips)
• Target: Previous zone midline → Hour 1 low → Hour 1 mid
SHORT ENTRY (at upper zones):
• Price in B+, A+, or S+ zone ABOVE Hour 1 high
• Midline touch occurs
• Bearish reversal pattern
• Entry: Next candle open or break of reversal candle low
• Stop: Above the zone (tight 10-20 pips)
• Target: Previous zone midline → Hour 1 high → Hour 1 mid
Pro Tips:
• A+ setups (3.618-4.0x) have the best risk/reward
• S+ setups (4.618-5.0x) are rare but explosive
• B+ setups (2.618-3.0x) are most common during trending days
• Always check for confluence with previous day high/low
Best markets: Forex (EUR/USD, GBP/USD), Indices (ES, NQ)
─────────────────────────────────────────────────────────────
STRATEGY 3: MULTI-HOUR RANGE ALIGNMENT ⭐⭐⭐⭐ Institutional Play
Concept: When multiple hour ranges align or overlap, those levels become magnetic price zones.
What to look for:
• Hour 1 high aligns with Hour 2 low
• Hour 3 (Fedwire) range respects Hour 1 boundaries
• Hour 4 (NY session) stays within expanded range
POWER SETUP - Triple Alignment:
1. Hour 1 high = $4500
2. Hour 2 range: $4495-$4510 (overlaps Hour 1 high)
3. Hour 3 (Fedwire) tests $4500 multiple times
4. This means $4500 is a MAJOR level
How to trade it:
• If price is BELOW $4500: Buy when it approaches, stop below Hour 1 low
• If price is ABOVE $4500: Sell when it approaches, stop above Hour 2 high
• Target: Opposite boundary of the aligned ranges
Why it works: Multiple institutions are watching the same levels. Banks trade off Fedwire levels, algos trade off Hour 1, market makers defend key ranges.
─────────────────────────────────────────────────────────────
STRATEGY 4: FEDWIRE BREAKOUT (Hour 3 Play) ⭐⭐⭐⭐⭐ News Trading
Concept: 08:30 EST is economic data release time AND when the Federal Reserve Fedwire system opens. This creates explosive volatility.
Pre-Setup (before 08:30):
1. Hour 1 and Hour 2 ranges established
2. Note where Hour 1 high/low sits
3. Identify which Fibonacci zones are nearby
4. Bias: Look at first candle (black lines) - bullish or bearish close?
The Play (08:30-09:30 - Hour 3):
1. News drops at 08:30 (NFP, CPI, Fed decision, etc.)
2. Price violently breaks Hour 1 range
3. Decision point:
• If price clears Hour 1 high/low cleanly → Ride the breakout
• If price fakes out then reverses → Fade the move
BREAKOUT TRADE:
• Entry: Price closes above Hour 1 high (for longs)
• Confirmation: Hour 3 (blue box) forms ABOVE Hour 1
• Stop: Hour 1 midline
• Target: B+ or A+ Fibonacci zone (2.618x-4.0x range)
FADE TRADE:
• Entry: Price spikes into A+ or S+ zone then reverses back into Hour 1
• Confirmation: Rejection wick + label appears
• Stop: Beyond the spike high/low
• Target: Hour 1 midline or opposite side
Risk warning: News can cause slippage. Use limit orders or wait for confirmation.
─────────────────────────────────────────────────────────────
STRATEGY 5: NY SESSION TREND CONTINUATION (Hour 4) ⭐⭐⭐⭐ Swing Trading
Concept: The 09:30-16:00 session (Hour 4 - purple) is when real trends develop. Use earlier hours as a roadmap.
Setup:
1. By 09:30, you have Hours 1, 2, and 3 established
2. Identify the dominant direction:
• Price consistently ABOVE Hour 1 high = Bullish day
• Price consistently BELOW Hour 1 low = Bearish day
• Price INSIDE Hour 1 range = Ranging day
BULLISH DAY CONTINUATION:
• Hour 4 opens above Hour 1 high
• Wait for pullback to Hour 1 high or Hour 2 high
• Entry: Bounce off previous hour's high
• Stop: Hour 1 midline
• Target: B+ or A+ zone (aggressive), C+ zone (conservative)
BEARISH DAY CONTINUATION:
• Hour 4 opens below Hour 1 low
• Wait for rally to Hour 1 low or Hour 2 low
• Entry: Rejection off previous hour's low
• Stop: Hour 1 midline
• Target: B+ or A+ zone (aggressive), C+ zone (conservative)
RANGING DAY FADE:
• Hour 4 price action stays inside Hour 1 range
• Strategy: Fade the extremes
• Sell: Hour 1 high tests
• Buy: Hour 1 low tests
• Target: Hour 1 midline (quick scalps)
Best for: Indices (ES, NQ, SPY), Forex majors
─────────────────────────────────────────────────────────────
STRATEGY 6: MIDLINE TOUCH SCALPING ⭐⭐⭐⭐ Active Trading
Concept: The dashed midlines through each Fibonacci zone act as micro support/resistance. The yellow labels tell you exactly when to pay attention.
How it works:
1. Enable "Show Fibonacci Midline Crosses" (default is ON)
2. Set "First Touch Only" to FALSE (to see all touches)
3. Watch for yellow labels to appear: GZ, D+, C+, B+, A+, S+
The Trade:
• Label appears = Price just hit a critical midline
• Decision: Will it bounce or break through?
BOUNCE SCALP:
• Label appears at S+, A+, or B+ zone
• Price shows immediate rejection (wick)
• Entry: Market or limit at the midline
• Stop: 10-15 pips beyond the zone
• Target: Previous zone midline (quick 20-40 pip scalp)
BREAKTHROUGH SCALP:
• Label appears at lower grade (D+, C+)
• Price blasts through without hesitation
• Entry: On the break, ride to next zone
• Stop: Back below/above the midline
• Target: Next zone midline
Best timeframes: 1-minute, 5-minute (for active scalping)
Best sessions: London (02:00-05:00), NY Open (09:30-11:00)
═══════════════════════════════════════════════════════════════
ADVANCED TRADING CONCEPTS
1. THE FIRST CANDLE BIAS (Black Lines)
The two black lines extending from midnight represent the OPEN and CLOSE of the very first 00:00 EST candle.
Reading the signal:
• Close ABOVE Open (upper line higher) = Bullish session likely
• Close BELOW Open (lower line higher) = Bearish session likely
• Large gap between lines = Strong directional intent
• Small gap between lines = Choppy/ranging day ahead
How to use it:
• If bullish candle: Look for longs at Hour 1 low, Golden Zone below
• If bearish candle: Look for shorts at Hour 1 high, Golden Zone above
• These lines often act as intraday support/resistance
─────────────────────────────────────────────────────────────
2. ZONE STACKING - THE CONFLUENCE MULTIPLIER
When multiple technical factors align at a Fibonacci zone, the setup quality exponentially increases.
Perfect Setup Checklist:
✅ Price at A+ or S+ Fibonacci zone
✅ Aligns with previous day high/low
✅ Aligns with Hour 2 or Hour 3 boundary
✅ Round number nearby (e.g., 100.00, 2000.00, 4500.00)
✅ Trendline confluence
✅ Volume spike
✅ Time confluence (London open, NY open, news)
Example:
• Hour 1 high: $5000
• A+ zone above: $5180
• Previous day high: $5175
• Round number: $5200
• = $5180-$5200 is a MONSTER reversal zone
─────────────────────────────────────────────────────────────
3. MANAGING TRADES THROUGH MULTIPLE ZONES
When you enter at one zone and price travels through multiple zones:
Profit-Taking Strategy:
• Entry: Golden Zone reversal
• Target 1 (33%): Hour 1 midline - take partial profit
• Target 2 (33%): Hour 1 high/low - move stop to breakeven
• Target 3 (34%): Opposite D+ or C+ zone - let it run
Stop Loss Management:
• Start: Beyond entry zone
• After Target 1: Move to breakeven
• After Target 2: Trail below/above each zone's midline
• Final: Lock in profits at each Fibonacci level
═══════════════════════════════════════════════════════════════
MARKET-SPECIFIC TRADING TIPS
FOREX (EUR/USD, GBP/USD, USD/JPY)
• Use Golden Zones mode (neutral view)
• Best strategies: Golden Zone bounce, A+/B+ reversals
• Focus on: 02:00-05:00 EST (London), 08:30-10:00 EST (News)
• Typical Hour 1 range: 20-40 pips
• Grade A+ moves: 80-120 pips (achievable daily)
• Timeframes: 5-minute for entries, 15-minute for structure
CRYPTO (BTC, ETH)
• Use Graded Setups mode (visual extremes)
• Best strategies: S+/S++ hunting, Grade A+ reversals
• Focus on: All hours (24/7 market, but respect NYC midnight)
• Typical Hour 1 range: $100-300 (BTC), $5-15 (ETH)
• Grade S+ moves: $1000+ (BTC) - happens weekly
• Timeframes: 1-minute for scalps, 5-minute for swings
• Crypto is the most volatile for this system
INDICES (ES, NQ, SPY)
• Use Graded Setups mode (trending bias)
• Best strategies: Fedwire breakout, NY continuation, Multi-hour alignment
• Focus on: 08:30-10:30 EST (peak volatility)
• Typical Hour 1 range: 10-25 points (ES), 40-100 points (NQ)
• Grade A+ moves: 60+ points (ES) - weekly occurrence
• Timeframes: 1-minute for day trading, 5-minute for swing
• Most reliable for Fedwire hour (Hour 3) setups
GOLD (XAUUSD)
• Use Golden Zones mode (respects Fib levels)
• Best strategies: Golden Zone bounce, Multi-hour alignment
• Focus on: 08:30 EST (data), 02:00-04:00 EST (London)
• Typical Hour 1 range: $5-15
• Grade A+ moves: $30-50 - rare but powerful
• Timeframes: 5-minute for entries, 1-hour for context
═══════════════════════════════════════════════════════════════
INDICATOR SETTINGS GUIDE
ESSENTIAL SETTINGS:
Hour Colors
• Enable all 4 hours for full context
• Hour 1 (Yellow) is mandatory
• Hour 3 (Blue - Fedwire) is highly recommended
• Disable Hour 2/4 if chart looks too busy
Display Options
• Show Midlines: YES (critical for entries)
• Show Background Fill: YES (helps visualize zones)
• Show Fibonacci Extension Zones: YES (the whole point!)
• Fib Zone Visual Mode:
- Golden Zones: For neutral, range-bound markets
- Graded Setups: For trending, breakout trading
• Show Midline Crosses: YES (your trade alerts)
• Midline Cross Mode:
- LABELS: Professional look (GZ, C+, A+, S+)
- EMOJIS: Fun visual (⭐, 💎, ⚡, 👑)
• First Touch Only:
- TRUE: Only mark first time each midline is hit (cleaner)
- FALSE: Mark every touch (more signals, noisier)
Label Options
• Show Hour Labels: Preference (I turn this OFF for cleaner chart)
• Show Price Values: Preference
• Use Grade Labels:
- FALSE: Full text ("GRADE C+ SETUP")
- TRUE: Shortened (just "C+") - recommended for cleaner look
RECOMMENDED PRESET:
• Visual Mode: Graded Setups (for trending days)
• Upper Color: Red (shorts above)
• Lower Color: Lime/Green (longs below)
• Midline Crosses: LABELS, First Touch TRUE
• Grade Labels: TRUE (compact)
═══════════════════════════════════════════════════════════════
COMMON MISTAKES TO AVOID
❌ Trading before Hour 1 completes - Wait until 01:00 EST. The range MUST be established first.
❌ Ignoring the first candle bias - If the first candle closes bullish, don't force shorts. Trade with the bias.
❌ Chasing breakouts without confirmation - Wait for a zone touch + reversal pattern. Don't FOMO into moves.
❌ Taking every midline cross signal - Not every label is a trade. Wait for high-grade setups (A+, S+, Golden Zone).
❌ Using the same position size for all zones - S+ zones are rarer → Larger size, wider stop. D+ zones are common → Smaller size, tighter stop.
❌ Overcomplicating with all 4 hours - If confused, just use Hour 1 + Fibonacci zones. That's 90% of the edge.
❌ Not adjusting for market conditions - High volatility (news day): S+ and A+ zones hit frequently. Low volatility (weekend, holiday): Stick to Golden Zone and Hour 1 range.
❌ Fighting the Fedwire hour - 08:30-09:30 EST is the wildest hour. Respect the blue box (Hour 3).
═══════════════════════════════════════════════════════════════
THE COMPLETE DAILY TRADING ROUTINE
00:00 EST - MIDNIGHT (Hour 1 Begins)
• Orange line appears - new day starts
• Watch Hour 1 range form (yellow box)
• Note first candle close (black line) - bullish or bearish?
• NO TRADING YET - just observe
01:00 EST - HOUR 1 COMPLETES
• Yellow box is finalized
• Fibonacci zones are now drawn
• Decision time: Which zones are closest to price?
• Set alerts for Golden Zone touches
02:00-05:00 EST - LONDON SESSION (Hour 2)
• Price starts testing Hour 1 boundaries
• Watch for Golden Zone touches (GZ labels)
• Trade: Golden Zone bounces, A+/B+ reversals
• Best setups of the day often happen here
08:30 EST - FEDWIRE OPENS (Hour 3 Begins)
• Blue box appears
• NEWS RELEASES - volatility spikes
• Trade: Breakouts through Hour 1, Fedwire hour momentum
• Watch for fake-outs then reversals
09:30 EST - NY STOCK MARKET OPENS (Hour 4 Begins)
• Purple box appears
• Maximum liquidity
• Trade: Trend continuation, multi-hour alignment
• If Hour 1 high/low hasn't broken yet, it likely will now
12:00-14:00 EST - LUNCHTIME
• Volatility often decreases
• Good time to scale out of winners
• Avoid: New entries unless at major zones
15:00-16:00 EST - NY CLOSE
• Final hour - profit-taking
• Hour 4 (purple box) ends at 16:00
• Review: Did price respect the Fibonacci zones? Which grades worked best today?
═══════════════════════════════════════════════════════════════
RISK MANAGEMENT
Position Sizing by Grade:
• Golden Zone: 2% risk (highest probability)
• Grade C+/B+: 1.5% risk (good probability)
• Grade A+: 1.5-2% risk (excellent R:R)
• Grade S+: 2-3% risk (rare, high conviction)
• Grade S++/S+++: 3-5% risk (once a month, go big)
Stop Placement:
• Tight: 10-20 pips beyond zone (for scalps)
• Medium: Beyond the entire zone (for swings)
• Wide: Beyond multiple zones (for runners)
Profit Targets:
• Minimum: 2:1 reward to risk (conservative)
• Standard: 3:1 reward to risk (balanced)
• Aggressive: 5:1+ reward to risk (let winners run to opposite S+ zones)
Max Daily Trades:
• Scalping: 5-10 trades (quick in/out)
• Swing trading: 2-3 trades (hold through zones)
• Quality over quantity - wait for high-grade setups
═══════════════════════════════════════════════════════════════
PRO TIPS FROM THE TRENCHES
💡 The Golden Zone is sacred - If price reaches GZ and you miss the entry, don't chase. Wait for it to come back or move to the next zone.
💡 S+ zones are magnets - When price hits S+, S++, or S+++, it usually reverses hard. These are career-making trades.
💡 First candle = daily roadmap - Bullish first candle (close > open) = Long bias all day. Bearish first candle (close < open) = Short bias all day. Trade with the first candle, not against it.
💡 Fedwire hour is king - The 08:30-09:30 hour (blue box) is where institutions move big money. Respect this hour.
💡 Use confluence - A+ zone + previous day high + round number = triple confluence = TRADE OF THE DAY
💡 Grade means distance, not quality - Don't think "D+ is bad." It means distance from Hour 1. A D+ reversal can be just as profitable as an A+ one.
💡 Graded Setups mode for trends - When market is trending, use Graded Setups visual mode. The darker zones (S++, S+++) will POP visually.
💡 Golden Zones mode for ranging - When market is choppy, use Golden Zones mode. All yellow = treat all levels equally.
💡 Labels are your trade alerts - When a yellow label appears (GZ, C+, A+, S+), that's your notification to pay attention. Check the setup immediately.
💡 Multi-hour alignment is institutional - When Hour 1, Hour 2, and Hour 3 all stack at the same price, that level will hold or break violently. Big money is watching.
═══════════════════════════════════════════════════════════════
FREQUENTLY ASKED QUESTIONS
Q: Which visual mode should I use?
A: Golden Zones for ranging/choppy markets (all yellow). Graded Setups for trending markets (color-coded by direction). Start with Graded Setups - it's more intuitive.
Q: Do I need all 4 hours enabled?
A: No. Hour 1 + Hour 3 are the most important. Hour 2 and Hour 4 add context but aren't mandatory.
Q: What's the best Fibonacci zone to trade?
A: Golden Zone (GZ) has the highest win rate (70-80%). Grade A+ has the best risk/reward. Grade S+ has the biggest moves but is rarest.
Q: Should I trade during Hour 1 (00:00-01:00)?
A: Generally no. Wait for Hour 1 to complete at 01:00 EST. The range needs to be established first.
Q: What if price never leaves Hour 1 range all day?
A: It's a ranging day. Fade the extremes - sell at Hour 1 high, buy at Hour 1 low, target the midline. Don't force breakout trades.
Q: Can I use this on stocks?
A: Yes, but it works best on indices and forex because they trade 24 hours. Individual stocks don't have a true midnight range.
Q: What timeframe should I use?
A: 5-minute for entries and exits. 15-minute for structure and context. 1-minute for active scalping.
Q: How do I know if a midline touch is a good trade?
A: Look for confirmation:
• Rejection wick (long tail)
• Reversal candle pattern (engulfing, pin bar)
• Volume spike
• Confluence with other levels
Q: What's the difference between this and the Liquidations indicator?
A: Liquidations uses leverage-based zones (for crypto). Fedwire + Fibonacci uses institutional time windows + classic Fibonacci math. Liquidations = crypto focus. Fedwire = all markets.
Q: Why are S++/S+++/PRO/EXPERT zones so far away?
A: They're extreme move zones. They only get hit during:
• Major news events
• Market crashes/spikes
• Central bank interventions
• Black swan events
• When they DO get hit, the trades are legendary
═══════════════════════════════════════════════════════════════
FINAL WORDS - THE TRADING PHILOSOPHY
This indicator is not a crystal ball. It's a framework.
It shows you:
• WHERE institutional levels are (Fibonacci zones)
• WHEN institutions trade (4 NYC hour windows)
• HOW FAR price has moved (grade system)
• WHAT the bias is (first candle, visual modes)
Your job as a trader:
1. Wait for Hour 1 to complete (patience)
2. Identify high-grade setups (A+, S+, Golden Zone)
3. Wait for confirmation (price action, confluence)
4. Execute with discipline (proper stops, targets)
5. Manage the trade through zones (scale out, trail stops)
Remember:
• Golden Zone = Highest win rate
• A+ / S+ zones = Best risk/reward
• Fedwire hour = Biggest institutional moves
• First candle = Daily bias
• Multi-hour alignment = Magnetic levels
Trade smart. Trade with the institutions. Trade the NYC Midnight Fedwire + Fibonacci way.
═══════════════════════════════════════════════════════════════
© 2026 NYC Midnight Fedwire + Fibonacci Trading Guide
This is the most complete hour-based institutional trading system available.
Master these concepts, and you'll never look at the NYC session the same way again.
Good luck, and may your trades hit S+ zones! 🚀

Complete G4 | CG4 (DTD)This script was built with the intention of improving day trading capabilities for the Futures market, namely for NQ.
The novelty of the script are the Ghetto Fibonacci Opening Range Retracement (G4) levels themselves and HOW they are calculated, providing Fibonacci pivot projections after the first 1-minute candle of the day. It is believed and understood that some major algorithms establish their positions within the first 30 seconds, defining a traded range for the day. With the help of some familiar Fibonacci levels and some custom ones, we can identify strong potential areas of support and resistance throughout the session. This process is repeated at New York and Globex open to obtain the projected full daily candle range for a futures instrument.
To support trade location context, signal alerts are provided for candles that interact with the lines given certain criteria. Some of the criteria deals with previous data such as high, low, open, and close, relative to the last N candles. An ATR gate is included and adjustable to filter for candle significance as well. The intention is to turn the indicator into a strategy that is used for algorithmic trading.
To make this indicator more of a one-stop-shop, I've also added some other public scripts as optionable toggles, but extremely helpful to build context for trade bias. Both SHLFE ( ) and Order Block ( ) indicators were added, with the Order Block indicator getting a buff that allows users to pick a second timeframe to display recent order blocks.
I do recommend starting with just the G4 lines in the beginning to learn how to read price action around the lines, then adding in the context from the other two indicators:
There will be many updates to come that improves functionality and reliability of the trade signals with improved logic.
Access will be temporary until the end of Q1 2026.
'Then Jesus said, “Come to me, all of you who are weary and carry heavy burdens, and I will give you rest. Take my yoke upon you. Let me teach you, because I am humble and gentle at heart, and you will find rest for your souls. For my yoke is easy to bear, and the burden I give you is light.”'
Matthew 11:28-30

IDWM Master StructureExecutive Summary
The IDWM Master Structure is a Multi-Timeframe (MTF) trading tool designed to force discipline by aligning traders with the "Parent" trend. It functions by locking onto the "Completed Auction" of a higher timeframe candle (like a Daily or Weekly bar) and projecting that structure onto your lower timeframe chart. Its primary goal is to define the "Dealing Range"—the hard boundaries where value was previously established—so you don't get lost in the noise of smaller price movements.
1. The Principle of Completed Auctions (Hierarchy)
Most technical indicators curve dynamically with every price tick. This script acts differently because it relies on "Settled Arguments." A closed Daily candle represents a finished battle between buyers and sellers; the High and Low are the historical results of that battle.
To enforce this, the script automatically selects a "Parent" timeframe based on your view:
Scalping (charts below 15 minutes) uses the 4-Hour Auction.
Intraday trading (15 minutes to 4 Hours) uses the Daily Auction.
Swing trading (Daily chart) uses the Weekly Auction.
2. Liquidity Pools & The Sticky Range
The High and Low lines drawn by the indicator are not just support and resistance; they represent Liquidity Pools. In market theory, stop-losses (Sell Stops below Lows, Buy Stops above Highs) accumulate at these edges.
Smart money often pushes price just past these lines to grab this liquidity (a "Stop Hunt") before reversing direction. To account for this, the script uses a "Sticky Range" mechanism. It refuses to redraw the box simply because price touched the line. Instead, it uses an Average True Range (ATR) Buffer. A new structure is only formed if the candle closes decisively outside the range plus this volatility buffer. This ensures you are trading real breakouts, not liquidity sweeps.
3. Internal Range Mechanics (Premium vs. Discount)
Inside the Master Box, the script applies Equilibrium Theory to help with trade location.
The most important internal line is the Equilibrium (EQ), which marks the exact 50% point of the range.
Premium Zone (Above EQ): Price is mathematically "expensive" relative to the recent range. Algorithms generally look to establish Short positions here.
Discount Zone (Below EQ): Price is considered "cheap." Algorithms generally look to establish Long positions here.
It also plots the Master Open, which acts as a "Line in the Sand." If price is currently trading above the Master Open, the higher timeframe candle is Green (Bullish), suggesting longs have a higher probability. If below, the candle is Red (Bearish).
4. Wick Theory (Failed Auctions)
The script places special emphasis on the wicks of the Master Candle because a wick represents a "Failed Auction"—a price level the market tried to explore but ultimately rejected.
The indicator highlights the background of the wick area (from the High to the Body). On a retest, these zones often act as supply or demand blocks because the market remembers the previous failure.
It also calculates the "Consequent Encroachment," which is the 50% midpoint of the wick. The rule of thumb here is that if a candle body can close past 50% of a wick, the rejection is nullified, and price will likely travel to fill the entire wick.
5. Energy Expansion (Breakout Targets)
Market energy transfers from Consolidation (inside the box) to Expansion (the breakout). When the price finally breaks the "Sticky Range" (confirming via the ATR buffer), the script projects where that energy will go.
It uses the height of the previous range to calculate Fibonacci extensions. Specifically, it targets the 1.618 Extension, often called the "Golden Ratio." This is a statistically significant level where expansion moves tend to exhaust themselves and reverse.
6. Safety Protocol: Live Detection
A dashboard monitors the state of the parent candle. If the text turns Magenta with a warning symbol, it means the Higher Timeframe candle is "Live" (still forming).
Trading off a live structure is considered higher risk because the "Auction" isn't finished—the High or Low can still shift. The safest approach is to trade when the dashboard indicates a standard, locked, historical structure.

Fibonacci Projection with Volume & Delta Profile (Zeiierman)█ Overview
Fibonacci Projection with Volume & Delta Profile (Zeiierman) blends classic Fibonacci swing analysis with modern volume-flow reading to create a unified, projection-based market framework. The indicator automatically detects the latest swing high and swing low, builds a complete Fibonacci structure, and then projects future extension targets with clear visual pathways.
What makes this tool unique is the integration of two volume-based systems directly into the Fibonacci structure. A Fib-aligned Volume Profile shows how bullish and bearish volume accumulated inside the swing range, while a separate Delta Profile reveals the imbalance of buy–sell pressure inside each Fibonacci interval. Together, these elements transform the standard Fibonacci tool into a multi-dimensional structural and volume-flow map.
█ How It Works
The indicator first detects the most recent swing high and swing low using the Period setting. That swing defines the Fibonacci range, from which the script draws retracement levels (0.236–0.786) and builds a forward projection path using the chosen Projection Level and a 1.272 extension.
Along this path, it draws projection lines, target boxes, and percentage labels that show how far each projected leg extends relative to the previous one.
Inside the same swing range, the script builds a Fib-based Volume Profile by splitting price into rows and assigning each bar’s volume as bullish (close > open) or bearish (close ≤ open). On top of that, it calculates a Volume Delta Profile between each pair of fib levels, showing whether buyers or sellers dominated that band and how strong that imbalance was.
█ How to Use
This tool helps traders quickly understand market structure and where the price may be heading next. The projection engine shows the most likely future targets, highlights strong or weak legs in the move, and updates automatically whenever a new swing forms. This ensures you always see the most relevant and up-to-date projection path.
The Fib Volume Profile shows where volume supported the move and where it did not. Thick bullish buckets reveal zones where buyers stepped in aggressively, often becoming retestable support. Thick bearish buckets highlight zones of resistance or rejection, particularly useful if projected levels align with prior liquidity.
The Delta Profile adds a second dimension to volume reading by showing where buy–sell pressure was truly imbalanced. A projected Fibonacci target that aligns with a strong bullish delta, for example, may suggest continuation. A projection into a band dominated by bearish delta may warn of reversal or hesitation.
█ Settings
Period – bars used to determine swing high/low
Projection Level – chosen Fib ratio for projection path
-----------------
Disclaimer
The content provided in my scripts, indicators, ideas, algorithms, and systems is for educational and informational purposes only. It does not constitute financial advice, investment recommendations, or a solicitation to buy or sell any financial instruments. I will not accept liability for any loss or damage, including without limitation any loss of profit, which may arise directly or indirectly from the use of or reliance on such information.
All investments involve risk, and the past performance of a security, industry, sector, market, financial product, trading strategy, backtest, or individual's trading does not guarantee future results or returns. Investors are fully responsible for any investment decisions they make. Such decisions should be based solely on an evaluation of their financial circumstances, investment objectives, risk tolerance, and liquidity needs.

Fibonacci Ret/Ext ProFibonacci Ret/Ext Pro - Advanced Fibonacci Retracement & Extension Tool
Transform your technical analysis with this professional-grade Fibonacci indicator that automatically detects market structure and draws precise retracement and extension levels.
Key Features:
🎯 Smart Market Structure Detection
Automatic pivot high/low identification with customizable periods
CHoCH (Change of Character) visualization
Real-time swing tracking with intelligent structure recognition
Bullish/bearish market structure highlighting
📊 Comprehensive Fibonacci Levels
Standard levels: 0, 23.6%, 38.2%, 50%, 61.8%, 78.6%, 100%
Extension levels: 127.2%, 161.8%
Negative retracement levels: -27.2%, -38.2%, -61.8%, -100%, -161.8%, -200%
Fully customizable level values and colors
⚙️ Advanced Customization
Individual level toggles - show only what you need
Custom colors for each Fibonacci level
Adjustable line widths and styles
Smart label positioning with price display
Golden Zone highlighting (customizable fill areas)
🔄 Dynamic Display Options
Real-time level extension to current bar
Swing line connections between pivots
Automatic level updates on structure changes
Clean chart display - old levels are automatically cleared
📍 Professional Labeling
Configurable label positions (left/right, above/below/on-line)
Multiple size options (tiny to large)
Price values displayed alongside Fibonacci ratios
Clean, professional appearance
How It Works:
The indicator automatically identifies significant swing highs and lows based on your chosen structure period. When market structure changes from bullish to bearish (or vice versa), it instantly calculates and displays Fibonacci levels from the most recent swing points. No manual drawing required - the algorithm handles everything automatically.
Perfect For:
Swing traders identifying key support/resistance levels
Day traders looking for precise entry/exit points
Position traders planning long-term entries
Anyone seeking professional Fibonacci analysis without manual plotting
Settings Presets:
Short (8 bars) - For intraday/scalping
Medium (21 bars) - For swing trading
Long (55 bars) - For position trading
Custom - Define your own structure period
This indicator provides clean, professional Fibonacci analysis that updates automatically as market structure evolves. No more manual Fibonacci drawing - let the algorithm identify the key levels for you.
Want to take your trading to the next level?
This Fibonacci tool is just one component of a complete trading system. For the full professional experience, check out my Optimus Indicator - a comprehensive full-stack trading system that includes:
Multi-timeframe trend analysis
Advanced buy/sell signals with filtering
Win/loss tracking and statistics
Stop loss management
Real-time alerts and notifications
And much more...
The Optimus Indicator provides everything a serious trader needs in one integrated platform. If you're ready for professional-grade trading tools, reach out privately for access to the complete system.
Disclaimer: This indicator is for educational and informational purposes only. Past performance does not guarantee future results. Always use proper risk management and never risk more than you can afford to lose.

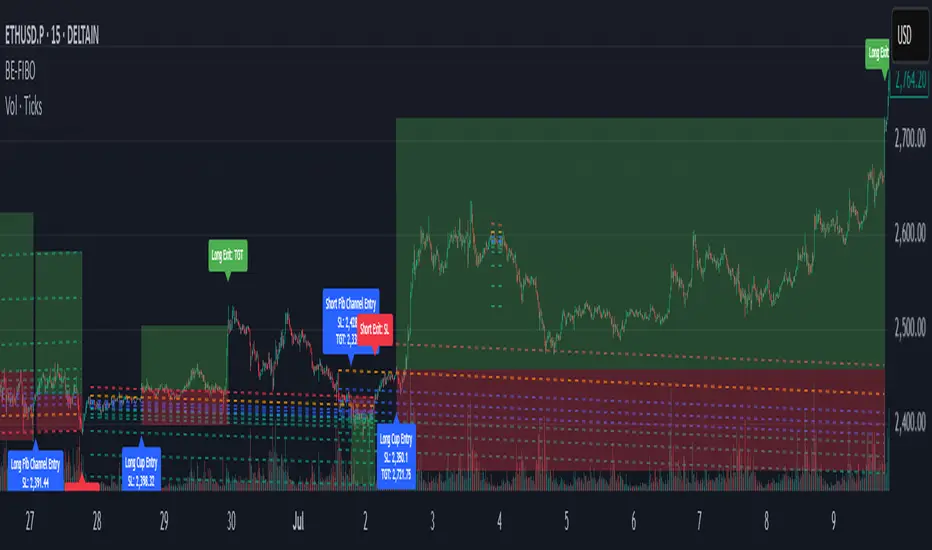
BE-Fib Channel 2 Sided Trading█ Overview:
"BE-Fib Channel 2 Sided Trading" indicator is built with the thought of 2 profound setups named "Cup & Handle (C&H)" and "Fibonacci Channel Trading (FCT)" with the context of "day trading" or with a minimum holding period.
█ Similarities, Day Trading Context & Error Patterns:
While the known fact is that both C&H and FCT provide setups with lesser risk with bigger returns, they both share the similar "Base Pattern".
Note: Inverse of the above Image shall switch the setups between long vs short.
Since the indicator is designed for smaller time-frame candles, there may be instances where the "base pattern" does not visually resemble a Cup & Handle (C&H) pattern. However, patterns are validated using pivot points. The points labeled "A" and "C" can be equal or slightly slanted. Settings of the Indicator allows traders a flexibility to control the angle of these points to spot the strategies according to set conditions. Therefore, understanding the nuances of these patterns is crucial for effective decision-making.
█ 2 Sided Edge: FCT suggests to take trade closer to the yellow line to get better RR ratio. this leaves a small chance of doubt as to; what if price is intended to break the Yellow line thereby activating the C&H.
Wait for the confirmation is a Big FOMO with a compromised RR.
Hence, This indicator is designed to handle both the patterns based on the strength, FIFO and pattern occurring delay.
█ How to Use this Indicator:
Step 1: Enable the Show Sample Sensitivity option to understand the angle of yellow line shown in the sample image. By enabling this option, On the last bar you shall see 4 lines being plotted depicting the max angle which is acceptable for both long and short trades.
Note: Angle can be controlled via setting "Sensitivity".
Higher Sensitivity --> Higher Setup identification --> can lead to failed setups due to 2 sided trading.
Lower Sensitivity --> Lower Setup identification --> can increase the changes of being right.
Step 2: Adjust the look back & look forward periods which shall be used for identifying patterns.
Note: Smaller values can lead to more setups being identified but can hamper the performance of the indicator while increasing the chances of failures. larger values identifies more significant setup but leads to more waiting period thereby compromising on the RR.
Step 3: Adjust the Base Range.
Note: Smaller values can lead to more setups being identified but can hamper the performance of the indicator while increasing the chances of failures. larger values identifies more significant setup but leads to more Risk on play.
Step 4: set the Entry level for FCT & Set the SL for Both FCT & C&H and Target Reward ratio for C&H.
█ Features of Indicator & How it works:
1. Patterns are being identified using Pivot Points method.
2. Tracks & validates both the setups simultaneously on every candle and traded one at a time based on FIFO, New setups found in-between, Defined Entry Levels while on wait for the other pattern to get activated.
3. Alerts added for trade events.
4. FCT setups are generally traded with trailed SL level and increasing Target level on every completed bar. while C&H has the standard SL & TP level with no Trail SL option.
DISCLAIMER: No sharing, copying, reselling, modifying, or any other forms of use are authorized for our documents, script / strategy, and the information published with them. This informational planning script / strategy is strictly for individual use and educational purposes only. This is not financial or investment advice. Investments are always made at your own risk and are based on your personal judgement. I am not responsible for any losses you may incur. Please invest wisely.
Happy to receive suggestions and feedback in order to improve the performance of the indicator better.
ATR Stop-Loss with Fibonacci Take-Profit [jpkxyz]ATR Stop-Loss with Fibonacci Take-Profit Indicator
This comprehensive indicator combines Average True Range (ATR) volatility analysis with Fibonacci extensions to create dynamic stop-loss and take-profit levels. It's designed to help traders set precise risk management levels and profit targets based on market volatility and mathematical ratios.
Two Operating Modes
Default Mode (Rolling Levels)
In default mode, the indicator continuously plots evolving stop-loss and take-profit levels based on real-time price action. These levels update dynamically as new bars form, creating rolling horizontal lines across the chart. I use this mode primarily to plot the rolling ATR-Level which I use to trail my Stop-Loss into profit.
Characteristics:
Levels recalculate with each new bar
All selected Fibonacci levels display simultaneously
Uses plot() functions with trackprice=true for price tracking
Custom Anchor Mode (Fixed Levels)
This is the primary mode for precision trading. You select a specific timestamp (typically your entry bar), and the indicator locks all calculations to that exact moment, creating fixed horizontal lines that represent your actual trade levels.
Characteristics:
Entry line (blue) marks your anchor point
Stop-loss calculated using ATR from the anchor bar
Fibonacci levels projected from entry-to-stop distance
Lines terminate when price breaks through them
Includes comprehensive alert system
Core Calculation Logic
ATR Stop-Loss Calculation:
Stop Loss = Entry Price ± (ATR × Multiplier)
Long positions: SL = Entry - (ATR × Multiplier)
Short positions: SL = Entry + (ATR × Multiplier)
ATR uses your chosen smoothing method (RMA, SMA, EMA, or WMA)
Default multiplier is 1.5, adjustable to your risk tolerance
Fibonacci Take-Profit Projection:
The distance from entry to stop-loss becomes the base unit (1.0) for Fibonacci extensions:
TP Level = Entry + (Entry-to-SL Distance × Fibonacci Ratio)
Available Fibonacci Levels:
Conservative: 0.618, 1.0, 1.618
Extended: 2.618, 3.618, 4.618
Complete range: 0.0 to 4.764 (23 levels total)
Multi-Timeframe Functionality
One of the indicator's most powerful features is timeframe flexibility. You can analyze on one timeframe while using stop-loss and take-profit calculations from another.
Best Practices:
Identify your entry point on execution timeframe
Enable "Custom Anchor" mode
Set anchor timestamp to your entry bar
Select appropriate analysis timeframe
Choose relevant Fibonacci levels
Enable alerts for automated notifications
Example Scenario:
Analyse trend on 4-hour chart
Execute entry on 5-minute chart for precision
Set custom anchor to your 5-minute entry bar
Configure timeframe setting to "4h" for swing-level targets
Select appropriate Fibonacci Extension levels
Result: Precise entry with larger timeframe risk management
Visual Intelligence System
Line Behaviour in Custom Anchor Mode:
Active levels: Lines extend to the right edge
Hit levels: Lines terminate at the breaking bar
Entry line: Always visible in blue
Stop-loss: Red line, terminates when hit
Take-profits: Green lines (1.618 level in gold for emphasis)
Customisation Options:
Line width (1-4 pixels)
Show/hide individual Fibonacci levels
ATR length and smoothing method
ATR multiplier for stop-loss distance

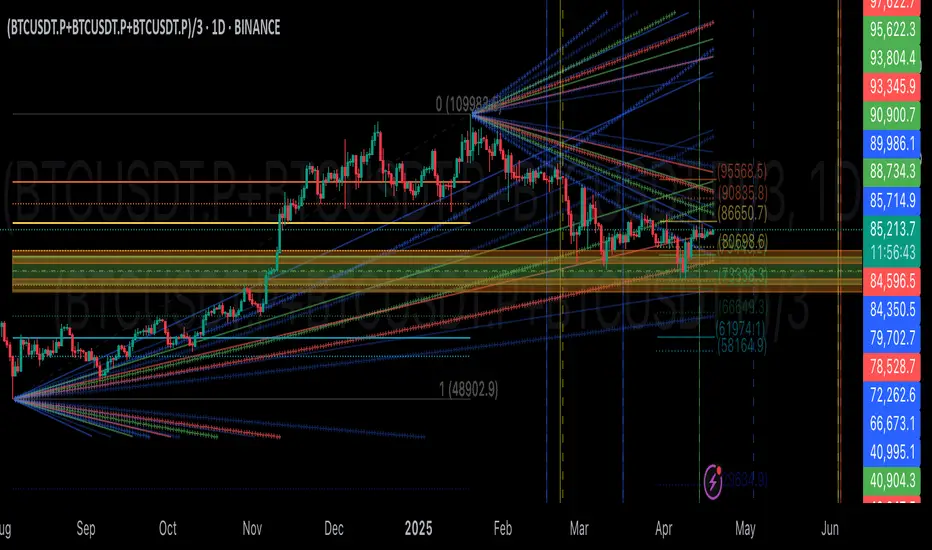
GIGANEVA V6.61 PublicThis enhanced Fibonacci script for TradingView is a powerful, all-in-one tool that calculates Fibonacci Levels, Fans, Time Pivots, and Golden Pivots on both logarithmic and linear scales. Its ability to compute time pivots via fan intersections and Range interactions, combined with user-friendly features like Bool Fib Right, sets it apart. The script maximizes TradingView’s plotting capabilities, making it a unique and versatile tool for technical analysis across various markets.
1. Overview of the Script
The script appears to be a custom technical analysis tool built for TradingView, improving upon an existing script from TradingView’s Community Scripts. It calculates and plots:
Fibonacci Levels: Standard retracement levels (e.g., 0.236, 0.382, 0.5, 0.618, etc.) based on a user-defined price range.
Fibonacci Fans: Trendlines drawn from a high or low point, radiating at Fibonacci ratios to project potential support/resistance zones.
Time Pivots: Points in time where significant price action is expected, determined by the intersection of Fibonacci Fans or their interaction with key price levels.
Golden Pivots: Specific time pivots calculated when the 0.5 Fibonacci Fan (on a logarithmic or linear scale) intersects with its counterpart.
The script supports both logarithmic and linear price scales, ensuring versatility across different charting preferences. It also includes a feature to extend Fibonacci Fans to the right, regardless of whether the user selects the top or bottom of the range first.
2. Key Components Explained
a) Fibonacci Levels and Fans from Top and Bottom of the "Range"
Fibonacci Levels: These are horizontal lines plotted at standard Fibonacci retracement ratios (e.g., 0.236, 0.382, 0.5, 0.618, etc.) based on a user-defined price range (the "Range"). The Range is typically the distance between a significant high (top) and low (bottom) on the chart.
Example: If the high is $100 and the low is $50, the 0.618 retracement level would be at $80.90 ($50 + 0.618 × $50).
Fibonacci Fans: These are diagonal lines drawn from either the top or bottom of the Range, radiating at Fibonacci ratios (e.g., 0.382, 0.5, 0.618). They project potential dynamic support or resistance zones as price evolves over time.
From Top: Fans drawn downward from the high of the Range.
From Bottom: Fans drawn upward from the low of the Range.
Log and Linear Scale:
Logarithmic Scale: Adjusts price intervals to account for percentage changes, which is useful for assets with large price ranges (e.g., cryptocurrencies or stocks with exponential growth). Fibonacci calculations on a log scale ensure ratios are proportional to percentage moves.
Linear Scale: Uses absolute price differences, suitable for assets with smaller, more stable price ranges.
The script’s ability to plot on both scales makes it adaptable to different markets and user preferences.
b) Time Pivots
Time pivots are points in time where significant price action (e.g., reversals, breakouts) is anticipated. The script calculates these in two ways:
Fans Crossing Each Other:
When two Fibonacci Fans (e.g., one from the top and one from the bottom) intersect, their crossing point represents a potential time pivot. This is because the intersection indicates a convergence of dynamic support/resistance zones, increasing the likelihood of a price reaction.
Example: A 0.618 fan from the top crosses a 0.382 fan from the bottom at a specific bar on the chart, marking that bar as a time pivot.
Fans Crossing Top and Bottom of the Range:
A fan line (e.g., 0.5 fan from the bottom) may intersect the top or bottom price level of the Range at a specific time. This intersection highlights a moment where the fan’s projected support/resistance aligns with a key price level, signaling a potential pivot.
Example: The 0.618 fan from the bottom reaches the top of the Range ($100) at bar 50, marking bar 50 as a time pivot.
c) Golden Pivots
Definition: Golden pivots are a special type of time pivot calculated when the 0.5 Fibonacci Fan on one scale (logarithmic or linear) intersects with the 0.5 fan on the opposite scale (or vice versa).
Significance: The 0.5 level is the midpoint of the Fibonacci sequence and often acts as a critical balance point in price action. When fans at this level cross, it suggests a high-probability moment for a price reversal or significant move.
Example: If the 0.5 fan on a logarithmic scale (drawn from the bottom) crosses the 0.5 fan on a linear scale (drawn from the top) at bar 100, this intersection is labeled a "Golden Pivot" due to its confluence of key Fibonacci levels.
d) Bool Fib Right
This is a user-configurable setting (a boolean input in the script) that extends Fibonacci Fans to the right side of the chart.
Functionality: When enabled, the fans project forward in time, regardless of whether the user selected the top or bottom of the Range first. This ensures consistency in visualization, as the direction of the Range selection (top-to-bottom or bottom-to-top) does not affect the fan’s extension.
Use Case: Traders can use this to project future support/resistance zones without worrying about how they defined the Range, improving usability.
3. Why Is This Code Unique?
Original calculation of Log levels were taken from zekicanozkanli code. Thank you for giving me great Foundation, later modified and applied to Fib fans. The script’s uniqueness stems from its comprehensive integration of Fibonacci-based tools and its optimization for TradingView’s plotting capabilities. Here’s a detailed breakdown:
All-in-One Fibonacci Tool:
Most Fibonacci scripts on TradingView focus on either retracement levels, extensions, or fans.
This script combines:
Fibonacci Levels: Static horizontal lines for retracement and extension.
Fibonacci Fans: Dynamic trendlines for projecting support/resistance.
Time Pivots: Temporal analysis based on fan intersections and Range interactions.
Golden Pivots: Specialized pivots based on 0.5 fan confluences.
By integrating these functions, the script provides a holistic Fibonacci analysis tool, reducing the need for multiple scripts.
Log and Linear Scale Support:
Many Fibonacci tools are designed for linear scales only, which can distort projections for assets with exponential price movements. By supporting both logarithmic and linear scales, the script caters to a wider range of markets (e.g., stocks, forex, crypto) and user preferences.
Time Pivot Calculations:
Calculating time pivots based on fan intersections and Range interactions is a novel feature. Most TradingView scripts focus on price-based Fibonacci levels, not temporal analysis. This adds a predictive element, helping traders anticipate when significant price action might occur.
Golden Pivot Innovation:
The concept of "Golden Pivots" (0.5 fan intersections across scales) is a unique addition. It leverages the symmetry of the 0.5 level and the differences between log and linear scales to identify high-probability pivot points.
Maximized Plot Capabilities:
TradingView imposes limits on the number of plots (lines, labels, etc.) a script can render. This script is coded to fully utilize these limits, ensuring that all Fibonacci levels, fans, pivots, and labels are plotted without exceeding TradingView’s constraints.
This optimization likely involves efficient use of arrays, loops, and conditional plotting to manage resources while delivering a rich visual output.
User-Friendly Features:
The Bool Fib Right option simplifies fan projection, making the tool intuitive even for users who may not consistently select the Range in the same order.
The script’s flexibility in handling top/bottom Range selection enhances usability.
4. Potential Use Cases
Trend Analysis: Traders can use Fibonacci Fans to identify dynamic support/resistance zones in trending markets.
Reversal Trading: Time pivots and Golden Pivots help pinpoint moments for potential price reversals.
Range Trading: Fibonacci Levels provide key price zones for trading within a defined range.
Cross-Market Application: Log/linear scale support makes the script suitable for stocks, forex, commodities, and cryptocurrencies.
The original code was from zekicanozkanli . Thank you for giving me great Foundation.
Autofib Extensions | DTDHello trader comuunity!
I'm introducing another script that is part of my main day-trading strategy. We all know regardless of what strategy we use, we need to know what levels offer the least amount of risk to our trade entry and a great tool to anticipate how far a move might go or what level a move may retrace to are the Fibonacci Retracement and Extensions. This indicator combines both together, but with a twist.
The main elements of the script are:
1. Multiple Session High and Lows | Developing my first script led me to understand that measuring key times during each session provides understanding of the market's continuity. I have provided 3 "sessions' a user can define according to CST time where the script saves the high and low of that session window to produce the retracement and extensions from those plots. Currently, the levels are always plotted from low to high (with the 0 mark being the high) and negative values provided so the levels are consistent. You can toggle each session on or off.
2. Coloring Key Retracements / Extensions | I use a dark background for my charts so the default colors help me distinguish from other another indicator I use. Feel free to adjust the colors to your preference. I consider 3 different colors because of their significance. Retracements that you want to see continue fall back into the .50 to .618 level (this I consider the "Golden Zone"). While basic Elliott Wave Theory states a wave is completed near the 1.618 level (this I consider "Major Extensions"). Everything isn't noise, but minor levels in a larger sequence.
______________
Script Limitations
All of my scripts are made with the help of ChatGPT so there are going to be limitations. One current one that I have made progress on, but not fully is when you are viewing a timeframe where the candle doesn't start when a session window starts. On smaller timeframes like the 7-minute this is not an issue. However, on the hourly, if your session window starts at the half hour which the 3rd session default window does, the lines will not produce. I will hopefully have this rectified in the near future. I will open the script since none of this work is original in nature and I would love to see how others can create a better product. Also, this is mainly a futures trading tool. If you are using this on stocks you will find it not as useful if the session window is too wide since the script waits until the session window closes to calculate the extension values.
Cheers,
DTD
Fibonacci Volume Profiles [AlgoAlpha]Unlock a deeper understanding of price action with the Fibonacci Volume Profiles indicator by AlgoAlpha! This powerful tool blends Fibonacci retracement levels with customizable volume profiles, helping traders identify high-probability areas of support, resistance, and accumulation. Designed for both continuous dynamic levels and custom time periods, this indicator is a must-have for traders seeking confluence in market structure analysis.
🔑 Key Features
📈 Dual Mode Selection : Choose between Continuous Fibonacci levels, which adapt dynamically to pivots, or a Custom Period mode, where you set your own start and end points.
📊 Integrated Volume Profile : Visualize volume distributions at key Fibonacci retracement levels, revealing areas of strong buying/selling interest.
🎨 Customizable Colors & Transparency : Adjust Fibonacci level colors, fill zones, and profile transparency for a visually clear experience.
🔍 Profile Resolution & Scaling : Control the number of price levels and width of the volume profile for detailed market insights.
🛠 Extendable Levels : Optionally extend Fibonacci levels to the right of the chart for better visualization of future price interaction.
📌 How to Use
Add the Indicator: Click on the star icon to add it to your favorites and apply it to your TradingView chart.
Analyze The Market: Observe how price interacts with Fibonacci levels alongside the volume profile to confirm support/resistance zones. Switch between custom range or continuous mode to align the tool with your trading style.
⚙️ How It Works
The indicator calculates pivot highs/lows dynamically (or uses user-defined time periods) to plot Fibonacci retracement levels. It then builds a volume profile by analyzing historical volume data, grouping it into price bins to highlight volume-heavy zones. The Point of Control (PoC) is identified as the level with the highest traded volume, acting as a key price magnet. The color-coded Fibonacci levels help traders spot retracement zones, while the volume profile confirms strength or weakness in those areas.

Auto Fibonacci Extension and Retracement with Visual AlertsThis indicator automatically calculates and plots Fibonacci retracement and extension levels based on recent swing highs and lows, making it a powerful tool for traders who use Fibonacci analysis in their strategies.
Key Features:
• Dynamic Fibonacci Levels: Automatically detects swing highs and lows over a user-defined lookback period to calculate key Fibonacci retracement (e.g., 0.236, 0.382, 0.618, etc.) and extension (e.g., 1.618, 2.618, etc.) levels.
• Visual Alerts: Displays intuitive visual alerts when the price crosses important Fibonacci levels.
• Blue dashed lines for retracement levels.
• Green dashed lines for extension levels.
• Labels with up or down arrows indicating price interactions with these levels.
• Swing High/Low Visualization: Marks recent swing highs and lows with crosses for better clarity.
• Customizable: Adjust the lookback period and Fibonacci levels to suit your trading style.
Who is it for?
This indicator is perfect for:
• Swing Traders: To identify potential reversal or continuation zones.
• Day Traders: For short-term setups based on Fibonacci levels.
• Fibonacci Enthusiasts: To automate the time-consuming process of manually plotting levels.
Usage Ideas:
1. Use retracement levels (e.g., 0.618) to identify areas of potential support or resistance.
2. Use extension levels (e.g., 1.618) to target potential breakout or continuation zones.
3. Combine this indicator with candlestick patterns, volume analysis, or other tools for confirmation.
Limitations:
• This is a standalone indicator and does not provide buy/sell signals. It’s recommended to combine it with other technical analysis tools for best results.
• The lookback period and swing detection rely on past data, so adjustments may be needed based on the asset or timeframe.
Whether you’re looking to streamline your Fibonacci analysis or explore new opportunities in your trading, this indicator is designed to save time, increase accuracy, and enhance your overall trading experience.

Fibonacci Extension Strt StrategyCore Logic and Steps:
Weekly Trend Identification:
Find the last significant Higher High (HH) and Lower Low (LL) or vice-versa on the Weekly timeframe.
Determine if it's an uptrend (HH followed by LL) or a downtrend (LL followed by HH).
Plot a Fibonacci Extension (or Retracement in reverse order) from the swing point determined to the other significant swing point.
Weekly Retracement Levels:
Display horizontal lines at the 0.236, 0.382, and 0.5 Fibonacci levels from the weekly extension.
Monitor price action on these levels.
Daily Confirmation:
When price hits the Fib levels, examine the Daily chart.
Look for a rejection wick (indicating the pull back is ending) on the identified weekly retracement levels.
Confirm that the price is indeed starting to continue in the direction of the original weekly trend.
Four-Hour Entry:
On the 4H timeframe, plot a new Fib Extension in the opposite direction of the weekly.
If it's an uptrend, the Fib is plotted from last swing low to its swing high. If the weekly trend was bearish the Fib will be plotted from last swing high to the swing low.
Generate an entry when price breaks the high of that candle.
Trade Management:
Entry is on the breakout of the current candle.
Stop Loss: Place the stop loss below the wick of the breakout candle.
Take Profit 1: Close 50% of the position at the 0.5 Fibonacci level. Move the stop loss to breakeven on this position.
Take Profit 2: Close another 25% of the position at the 0.236 Fib level.
Trailing Take Profit: Keep the last 25% open, using a trailing stop loss. (You'll need to define the logic for the trailing stop, e.g., trailing stop using the last high/low)
How to Use in TradingView:
Open a TradingView Chart.
Click on "Pine Editor" at the bottom.
Copy and paste the corrected Pine Script code.
Click "Add to Chart".
The indicator should now be displayed on your chart.

Fibonacci Time-Price Zones🟩 Fibonacci Time-Price Zones is a chart visualization tool that combines Fibonacci ratios with time-based and price-based geometry to analyze market behavior. Unlike typical Fibonacci indicators that focus solely on horizontal price levels, this indicator incorporates time into the analysis, providing a more dynamic perspective on price action.
The indicator offers multiple ways to visualize Fibonacci relationships. Drawing segmented circles creates a unique perspective on price action by incorporating time into the analysis. These segmented circles, similar to TradingView's built-in Fibonacci Circles, are derived from Fibonacci time and price levels, allowing traders to identify potential turning points based on the dynamic interaction between price and time.
As another distinct visualization method, the indicator incorporates orthogonal patterns, created by the intersection of horizontal and vertical Fibonacci levels. These intersections form L-shaped connections on the chart, derived from key Fibonacci price and time intervals, highlighting potential areas of support or resistance at specific points in time.
In addition to these geometric approaches, another option is sloped lines, which project Fibonacci levels that account for both time and price along the trendline. These projections derive their angles from the interplay between Fibonacci price levels and Fibonacci time intervals, creating dynamic zones on the chart. The slope of these lines reflects the direction and angle of the trend, providing a visual representation of price alignment with market direction, while maintaining the time-price relationship unique to this indicator
The indicator also includes horizontal Fibonacci levels similar to traditional retracement and extension tools. However, unlike standard tools, traders can display retracement levels, extension levels, or both simultaneously from a single instance of the indicator. These horizontal levels maintain consistency with the chosen visualization method, automatically scaling and adapting whether used with circles, orthogonal patterns, or slope-based analysis.
By combining these distinct methods—circles, orthogonal patterns, sloped projections, and horizontal levels—the indicator provides a comprehensive approach to Fibonacci analysis based on both time and price relationships. Each visualization method offers a unique perspective on market structure while maintaining the core principle of time-price interaction.
⭕ THEORY AND CONCEPT ⭕
While traditional Fibonacci tools excel at identifying potential support and resistance levels through price-based ratios (0.236, 0.382, 0.618), they do not incorporate the dimension of time in market analysis. Extensions and retracements effectively measure price relationships within trends, yet markets move through both price and time dimensions simultaneously.
Fibonacci circles represent an evolution in technical analysis by incorporating time intervals alongside price levels. Based on the mathematical principle that markets often move in circular patterns proportional to Fibonacci ratios, these circles project potential support and resistance zones as partial circles radiating from significant price points. However, traditional circle-based tools can create visual complexity that obscures key market relationships. The integration of time into Fibonacci analysis reveals how price movements often respect both temporal and price-based ratios, suggesting a deeper geometric structure to market behavior.
The Fibonacci Time-Price Zones indicator advances these concepts by providing multiple geometric approaches to visualize time-price relationships. Each shape option—circles, orthogonal patterns, slopes, and horizontal levels—represents a different mathematical perspective on how Fibonacci ratios manifest across both dimensions. This multi-faceted approach allows traders to observe how price responds to Fibonacci-based zones that account for both time and price movements, potentially revealing market structure that purely price-based tools might miss.
Shape Options
The indicator employs four distinct geometric approaches to analyze Fibonacci relationships across time and price dimensions:
Circular : Represents the cyclical nature of market movements through partial circles, where each radius is scaled by Fibonacci ratios incorporating both time and price components. This geometry suggests market movements may follow proportional circular paths from significant pivot points, reflecting the harmonic relationship between time and price.
Orthogonal : Constructs L-shaped patterns that separate the time and price components of Fibonacci relationships. The horizontal component represents price levels, while the vertical component measures time intervals, allowing analysis of how these dimensions interact independently at key market points.
Sloped : Projects Fibonacci levels along the prevailing trend, incorporating both time and price in the angle of projection. This approach suggests that support and resistance levels may maintain their relationship to price while adjusting to the temporal flow of the market.
Horizontal : Provides traditional static Fibonacci levels that serve as a reference point for comparing price-only analysis with the dynamic time-price relationships shown in the other three shapes. This baseline approach allows traders to evaluate how the incorporation of time dimension enhances or modifies traditional Fibonacci analysis.
By combining these geometric approaches, the Fibonacci Time-Price Zones indicator creates a comprehensive analytical framework that bridges traditional and advanced Fibonacci analysis. The horizontal levels serve as familiar reference points, while the dynamic elements—circular, orthogonal, and sloped projections—reveal how price action responds to temporal relationships. This multi-dimensional approach enables traders to study market structure through various geometric lenses, providing deeper insights into time-price symmetry within technical analysis. Whether applied to retracements, extensions, or trend analysis, the indicator offers a structured methodology for understanding how markets move through both price and time dimensions.
🛠️ CONFIGURATION AND SETTINGS 🛠️
The Fibonacci Time-Price Zones indicator offers a range of configurable settings to tailor its functionality and visual representation to your specific analysis needs. These options allow you to customize zone visibility, structures, horizontal lines, and other features.
Important Note: The indicator's calculations are anchored to user-defined start and end points on the chart. When switching between charts with significantly different price scales (e.g., from Bitcoin at $100,000 to Silver at $30), adjustment of these anchor points is required to ensure correct positioning of the Fibonacci elements.
Fibonacci Levels
The indicator allows users to customize Fibonacci levels for both retracement and extension analysis. Each level can be individually configured with the following options:
Visibility : Toggle the visibility of each level to focus on specific areas of interest.
Level Value : Set the Fibonacci ratio for the level, such as 0.618 or 1.000, to align with your analysis needs.
Color : Customize the color of each level for better visual clarity.
Line Thickness : Adjust the line thickness to emphasize critical levels or maintain a cleaner chart.
Setup
Zone Type : Select which Fibonacci zones to display:
- Retracement : Shows potential pull back levels within the trend
- Extension : Projects levels beyond the trend for potential continuation targets
- Both : Displays both retracement and extension zones simultaneously
Shape : Choose from four visualization methods:
- Circular : Time-price based semicircles centered on point B
- Orthogonal : L-shaped patterns combining time and price levels
- Sloped : Trend-aligned projections of Fibonacci levels
- Horizontal : Traditional horizontal Fibonacci levels
Visual Settings
Fill % : Adjusts the fill intensity of zones:
0% : No fill between levels
100% : Maximum fill between levels
Lines :
Trendline : The base A-B trend with customizable color
Extension : B-C projection line
Retracement : B-D pullback line
Labels :
Points : Show/hide A, B, C, D markers
Levels : Show/hide Fibonacci percentages
Time-Price Points
Set the time and price for the points that define the Fibonacci zones and horizontal levels. These points are defined upon loading the chart. These points can be configured directly in the settings or adjusted interactively on the live chart.
A and B Points : These user-defined time and price points determine the basis for calculating the semicircles and Fibonacci levels. While the settings panel displays their exact values for fine-tuning, the easiest way to modify these points is by dragging them directly on the chart for quick adjustments.
Interactive Adjustments : Any changes made to the points on the chart will automatically synchronize with the settings panel, ensuring consistency and precision.
🖼️ CHART EXAMPLES 🖼️
Fibonacci Time-Price Zones using the 'Circular' Shape option. Note the price interaction at the 0.786 level, which acts as a support zone. Additional points of interest include resistance near the 0.618 level and consolidation around the 0.5 level, highlighting the utility of both horizontal and semicircular Fibonacci projections in identifying key price areas.
Fibonacci Time-Price Zones using the 'Sloped' Shape option. The chart displays price retracing along the sloped Fibonacci levels, with blue arrows highlighting potential support zones at 0.618 and 0.786, and a red arrow indicating potential resistance at the 1.0 level. This visual representation aligns with the prevailing downtrend, suggesting potential selling pressure at the 1.0 Fibonacci level.
Fibonacci Time-Price Zones using the 'Orthogonal' Shape option. The chart demonstrates price action interacting with vertical zones created by the orthogonal lines at the 0.618, 0.786, and 1.0 Fibonacci levels. Blue arrows highlight potential support areas, while red arrows indicate potential resistance areas, revealing how the orthogonal lines can identify distinct points of price interaction.
Fibonacci Time-Price Zones using the 'Circular' Shape option. The chart displays price action in relation to segmented circles emanating from the starting point (point A). The circles represent different Fibonacci ratios (0.382, 0.5, 0.618, 0.786) and their intersections with the price axis create potential zones of support and resistance. This approach offers a visually distinct way to analyze potential turning points based on both price and time.
Fibonacci Time-Price Zones using the 'Sloped' Shape option. The sloped Fibonacci levels (0.786, 0.618, 0.5) create zones of potential support and resistance, with price finding clear interaction within these areas. The ellipses highlight this price action, particularly the support between 0.786 and 0.618, which aligns closely with the trend.
Fibonacci Time-Price Zones using the 'Circular' Shape option. The price action appears to be ‘hugging’ the 0.5 Fibonacci level, suggesting potential resistance. This demonstrates how the circular zones can identify potential turning points and areas of consolidation which might not be seen with linear analysis.
Fibonacci Time-Price Zones using the 'Sloped' Shape option with Point D marker enabled. The chart demonstrates clear price action closely following along the sloped Retracement line until the orthogonal intersection at the 0.618 levels where the trend is broken and price dips throughout the 0.618 to 0.786 horizontal zone. Price jumps back to the retracement slope at the start of the 0.786 horizontal zone and continues to the 1.0 horizontal zone. The aqua-colored retracement line is enabled to further emphasize this retracement slope .
Geometric validation using TradingView's built-in Fibonacci Circle tool (overlaid). The alignment at the 0.5 and 1.0 levels demonstrates the indicator's consistent approximation of Fibonacci Circles.
Comparison of Fibonacci Time-Price Zones (Shape: Horizontal) with TradingView's Built-in Retracement and Extension Tools (overlaid): This example demonstrates how the Horizontal structure aligns with TradingView’s retracement and extension levels, allowing users to integrate multiple tools seamlessly. The Fibonacci circle connects retracement and extension zones, highlighting the potential relationship between past retracements and future extensions.
📐 GEOMETRIC FOUNDATIONS 📐
This indicator integrates circular and straight representations of Fibonacci levels, specifically the Circular , Orthogonal , Sloped , and Horizontal shape options. The geometric principles behind these shapes differ significantly, requiring distinct scaling methods for accurate representation. The Circular shape employs logarithmic scaling with radial expansion, where the distance from a central point determines the level's position, creating partial circles that align with TradingView's built-in Fibonacci Circle tool. The other three shapes utilize geometric progression scaling for linear extension from a starting point, resulting in straight lines that align with TradingView's built-in Fibonacci retracement and extension tools. Due to these distinct geometric foundations and scaling methods, perfectly aligning both the partial circles and straight lines simultaneously is mathematically constrained, though any differences are typically visually imperceptible.
The Circular shape's partial circles are calculated and scaled to align with TradingView's built-in Fibonacci Circles. These circles are plotted from the second swing point onward. This approach ensures consistent and accurate visualization across all market types, including those with gaps or closed sessions, which unlike 24/7 markets, do not have a direct one-to-one correspondence between bar indices and time. To maintain accurate geometric proportions across varying chart scales, the indicator calculates an aspect ratio by normalizing the proportional difference between vertical (price) and horizontal (time) distances of the swing points. This normalization factor ensures geometric shapes maintain their mathematical properties regardless of price scale magnitude or time period span, while maintaining the correct proportions of the geometric constructions at any chart zoom level.
The indicator automatically applies the appropriate scaling factor based on the selected shape option, optimizing either circular proportions and proper radius calculations for each Fibonacci level, or straight-line relationships between Fibonacci levels. These distinct scaling approaches maintain mathematical integrity while preserving the essential characteristics of each geometric representation, ensuring optimal visualization accuracy whether using circular or linear shapes.
⚠️ DISCLAIMER ⚠️
The Fibonacci Time-Price Zones indicator is a visual analysis tool designed to illustrate Fibonacci relationships through geometric constructions incorporating both curved and straight lines, providing a structured framework for identifying potential areas of price interaction. It is not intended as a predictive or standalone trading signal indicator.
The indicator calculates levels and projections using user-defined anchor points and Fibonacci ratios. While it aims to align with TradingView’s Fibonacci extension, retracement, and circle tools by employing mathematical and geometric formulas, no guarantee is made that its calculations are identical to TradingView's proprietary methods.
Like all technical and visual indicators, these visual representations may visually align with key price zones in hindsight, reflecting observed price dynamics. However, these visualizations are not standalone signals for trading decisions and should be interpreted as part of a broader analytical approach.
This indicator is intended for educational and analytical purposes, complementing other tools and methods of market analysis. Users are encouraged to integrate it into a comprehensive trading strategy, customizing its settings to suit their specific needs and market conditions.
🧠 BEYOND THE CODE 🧠
The Fibonacci Time-Price Zones indicator is designed to encourage both education and community engagement. By integrating time-sensitive geometry with Fibonacci-based frameworks, it bridges traditional grid-based analysis with dynamic time-price relationships. The inclusion of semicircles, horizontal levels, orthogonal structures, and sloped trends provides users with versatile tools to explore the interaction between price movements and temporal intervals while maintaining clarity and adaptability.
As an open-source tool, the indicator invites exploration, experimentation, and customization. Whether used as a standalone resource or alongside other technical strategies, it serves as a practical and educational framework for understanding market structure and Fibonacci relationships in greater depth.
Your feedback and contributions are essential to refining and enhancing the Fibonacci Time-Price Zones indicator. We look forward to the creative applications, adaptations, and insights this tool inspires within the trading community.

Fibonacci Confluence Toolkit [LuxAlgo]The Fibonacci Confluence Toolkit is a technical analysis tool designed to help traders identify potential price reversal zones by combining key market signals and patterns. It highlights areas of interest where significant price action or reactions are anticipated, automatically applies Fibonacci retracement levels to outline potential pullback zones, and detects engulfing candle patterns.
Its unique strength lies in its reliance solely on price patterns, eliminating the need for user-defined inputs, ensuring a robust and objective analysis of market dynamics.
🔶 USAGE
The script begins by detecting CHoCH (Change of Character) points—key indicators of shifts in market direction. This script integrates the principles of pure price action as applied in Pure-Price-Action-Structures , where further details on the detection process can be found.
The detected CHoCH points serve as the foundation for defining an Area of Interest (AOI), a zone where significant price action or reactions are anticipated.
As new swing highs or lows emerge within the AOI, the tool automatically applies Fibonacci retracement levels to outline potential retracement zones. This setup enables traders to identify areas where price pullbacks may occur, offering actionable insights into potential entries or reversals.
Additionally, the toolkit highlights engulfing candle patterns within these zones, further refining entry points and enhancing confluence for better-informed trading decisions based on real-time trend dynamics and price behavior.
🔶 SETTINGS
🔹 Market Patterns
Bullish Structures: Enable or disable all bullish components of the indicator.
Bearish Structures: Enable or disable all bearish components of the indicator.
Highlight Area of Interest: Toggle the option to highlight the Areas of Interest (enabled or disabled).
CHoCH Line: Choose the line style for the CHoCH (Solid, Dashed, or Dotted).
Width: Adjust the width of the CHoCH line.
🔹 Retracement Levels
Choose which Fibonacci retracement levels to display (e.g., 0, 0.236, 0.382, etc.).
🔹 Swing Levels & Engulfing Patterns
Swing Levels: Select how swing levels are marked (symbols like ◉, △▽, or H/L).
Engulfing Candle Patterns: Choose which engulfing candle patterns to detect (All, Structure-Based, or Disabled).
🔶 RELATED SCRIPTS
Pure-Price-Action-Structures.
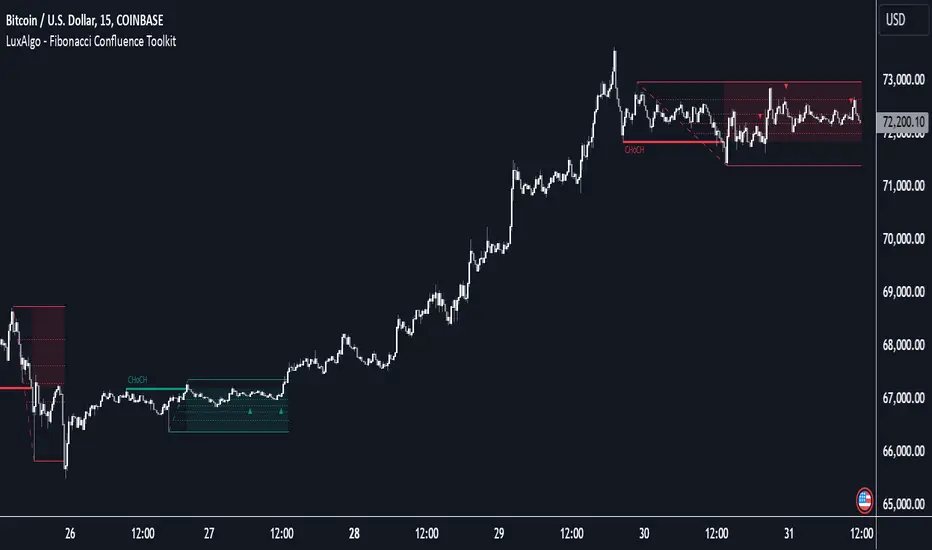
Onchain Analysis - BTCIntroduction
This indicator is designed to equip traders with actionable insights into long-term BITSTAMP:BTCUSD market dynamics through a blend of on-chain metrics and technical tools. It provides a streamlined visualization of market sentiment and critical price levels using unique and proprietary methodologies.
The script features:
NUPL (Net Unrealized Profit/Loss) with advanced bar color coding.
350DMA and 350DMAx2, offering insights into key Bitcoin cycle levels.
Logarithmic Fibonacci Extension, aiding in precise target setting during price discovery phases.
Core Functionality
NUPL Analysis
NUPL reflects the network's aggregate unrealized profit or loss, calculated as (Market Cap − Realized Cap) / Market Cap. Bars are color-coded dynamically to simplify the interpretation of market sentiment. The emotional states (e.g., euphoria, fear) are visually represented for quick analysis, making this indicator particularly valuable for traders monitoring Bitcoin's macro cycles. This implementation improves clarity by aggregating NUPL across all holders rather than separating short- and long-term holders.
350DMA and 350DMAx2
The 350DMAx2 line has historical relevance as a key level during Bitcoin bull cycles, often acting as a resistance point during price rallies. This implementation also includes precise visualization of price interaction with the 350DMA, enabling traders to anticipate potential retracement or breakout zones. Furthermore, to minimize chart clutter, the 350DMA and 350DMAx2 lines are designed to dynamically appear only when the price is near these levels. This ensures that traders can focus on relevant data without unnecessary visual distractions.
Logarithmic Fibonacci Extensions
Unlike traditional Fibonacci extensions, logarithmic levels better suit assets like Bitcoin that grow exponentially. The calculated levels provide traders with clear targets in price discovery phases, enhancing the utility of this feature.
Key Advantages and Unique Features
Enhanced Visualization : NUPL bar color-coding simplifies sentiment analysis, allowing traders to instantly identify key turning points in market psychology.
Historical Context : The script incorporates insights derived from past market cycles, emphasizing the significance of 350DMAx2 levels.
Customization : Traders can adapt settings like lookback periods (e.g., 500 for daily, 100 for weekly) to fit their preferred timeframe and trading strategy.
Proprietary Insights : The script integrates logarithmic Fibonacci levels in a unique manner, optimizing their application to logarithmic assets.
Why This Indicator is Valuable
This indicator is not a simple combination of existing tools; it is a carefully curated suite of functionalities designed to address specific needs of crypto traders. The advanced NUPL representation and integration of logarithmic Fibonacci make it a distinct addition to any trader's toolkit. It provides clarity in interpreting long-term trends and offers actionable insights for navigating Bitcoin's cyclical nature.
How to Use
NUPL Monitoring
Pay close attention to initial color changes, e.g. orange and red, since it may establish clear pull-back. Especially, when bars turn black, it suggests that the market is heavily in profit, often signaling a market top.
350DMAx2 Interaction
If the price is trading below or near the 350DMAx2 level, it often reflects a key resistance zone. Historically, price rejections from this level are common, offering traders critical insights into potential retracement scenarios.
Logarithmic Fibonacci Extensions
Logarithmic Fibonacci extension levels are especially valuable for assets like BITSTAMP:BTCUSD , which exhibit logarithmic growth. These levels provide:
Target Identification: During price discovery phases, the logarithmic Fibonacci levels act as critical resistance or support points, enabling traders to set realistic price targets.
Market Top Detection: When extreme NUPL values (e.g., black bars) align with price interaction near logarithmic Fibonacci levels, the likelihood of a market top increases significantly. This alignment offers a robust method for identifying overbought or overextended market conditions.
Combining Concepts
When NUPL's extreme signals (e.g., red or black bars) align with price movements near the 350DMAx2 level, the likelihood of a significant pullback increases. Additionally, these scenarios can be further validated by observing logarithmic Fibonacci resistance levels, which can provide added confidence in identifying market tops during price discovery phases.

FibExtender [tradeviZion]FibExtender : A Guide to Identifying Resistance with Fibonacci Levels
Introduction
Fibonacci levels are essential tools in technical analysis, helping traders identify potential resistance and support zones in trending markets. FibExtender is designed to make this analysis accessible to traders at all levels, especially beginners, by automating the process of plotting Fibonacci extensions. With FibExtender, you can visualize potential resistance levels quickly, empowering you to make more informed trading decisions without manually identifying every pivot point. In this article, we’ll explore how FibExtender works, guide you step-by-step in using it, and share insights for both beginner and advanced users.
What is FibExtender ?
FibExtender is an advanced tool that automates Fibonacci extension plotting based on significant pivot points in price movements. Fibonacci extensions are percentages based on prior price swings, often used to forecast potential resistance zones where price might reverse or consolidate. By automatically marking these Fibonacci levels on your chart, FibExtender saves time and reduces the complexity of technical analysis, especially for users unfamiliar with calculating and plotting these levels manually.
FibExtender not only identifies Fibonacci levels but also provides a customizable framework where you can adjust anchor points, colors, and level visibility to suit your trading strategy. This customization allows traders to tailor the indicator to fit different market conditions and personal preferences.
Key Features of FibExtender
FibExtender offers several features to make Fibonacci level analysis easier and more effective. Here are some highlights:
Automated Fibonacci Level Identification : The script automatically detects recent swing lows and pivot points to anchor Fibonacci extensions, allowing you to view potential resistance levels with minimal effort.
Customizable Fibonacci Levels : Users can adjust the specific Fibonacci levels they want to display (e.g., 0.618, 1.0, 1.618), enabling a more focused analysis based on preferred ratios. Each level can be color-coded for visual clarity.
Dual Anchor Points : FibExtender allows you to choose between anchoring levels from either the last pivot low or a recent swing low, depending on your preference. This flexibility helps in aligning Fibonacci levels with key market structures.
Transparency and Visual Hierarchy : FibExtender automatically adjusts the transparency of levels based on their "sequence age," creating a subtle visual hierarchy. Older levels appear slightly faded, helping you focus on more recent, potentially impactful levels.
Connection Lines for Context : FibExtender draws connecting lines from recent lows to pivot highs, allowing users to visualize the price movements that generated each Fibonacci extension level.
Step-by-Step Guide for Beginners
Let’s walk through how to use the FibExtender script on a TradingView chart. This guide will ensure that you’re able to set it up and interpret the key information displayed by the indicator.
Step 1: Adding FibExtender to Your Chart
Open your TradingView chart and select the asset you wish to analyze.
Search for “FibExtender ” in the Indicators section.
Click to add the indicator to your chart, and it will automatically plot Fibonacci levels based on recent pivot points.
Step 2: Customizing Fibonacci Levels
Adjust Levels : Under the "Fibonacci Settings" tab, you can enable or disable specific levels, such as 0.618, 1.0, or 1.618. You can also change the color for each level to improve visibility.
Set Anchor Points : Choose between "Last Pivot Low" and "Recent Swing Low" as your Fibonacci anchor point. If you want a broader view, choose "Recent Swing Low"; if you prefer tighter levels, "Last Pivot Low" may be more suitable.
Fib Line Length : Modify the line length for Fibonacci levels to make them more visible on your chart.
Step 3: Spotting Visual Clusters (Manual Analysis)
Identify Potential Resistance Clusters : Look for areas on your chart where multiple Fibonacci levels appear close together. For example, if you see 1.0, 1.272, and 1.618 levels clustered within a small price range, this may indicate a stronger resistance zone.
Why Clusters Matter : Visual clusters often signify areas where traders expect heightened price reaction. When levels are close, it suggests that resistance may be reinforced by multiple significant ratios, making it harder for price to break through. Use these clusters to anticipate potential pullbacks or consolidation areas.
Step 4: Observing the Price Action Around Fibonacci Levels
As price approaches these identified levels, watch for any slowing momentum or reversal patterns, such as doji candles or bearish engulfing formations, that might confirm resistance.
Adjust Strategy Based on Resistance : If price hesitates or reverses at a clustered resistance zone, it may be a signal to secure profits or tighten stops on a long position.
Advanced Insights (for Intermediate to Advanced Users)
For users interested in the technical workings of FibExtender, this section provides insights into how the indicator functions on a code level.
Pivot Point and Swing Detection
FibExtender uses a pivot-high and pivot-low detection function to identify significant price points. The upFractal and dnFractal variables detect these levels based on recent highs and lows, creating the basis for Fibonacci extension calculations. Here’s an example of the code used for this detection:
// Fractal Calculations
upFractal = ta.pivothigh(n, n)
dnFractal = ta.pivotlow(n, n)
By setting the number of periods for n, users can adjust the sensitivity of the script to recent price swings.
Fibonacci Level Calculation
The following function calculates the Fibonacci levels based on the selected pivot points and applies each level’s specific ratio (e.g., 0.618, 1.618) to project extensions above the recent price swing.
calculateFibExtensions(float startPrice, float highPrice, float retracePrice) =>
fibRange = highPrice - startPrice
var float levels = array.new_float(0)
array.clear(levels)
if array.size(fibLevels) > 0
for i = 0 to array.size(fibLevels) - 1
level = retracePrice + (fibRange * array.get(fibLevels, i))
array.push(levels, level)
levels
This function iterates over each level enabled by the user, calculating extensions by multiplying the price range by the corresponding Fibonacci ratio.
Example Use Case: Identifying Resistance in Microsoft (MSFT)
To better understand how FibExtender highlights resistance, let’s look at Microsoft’s stock chart (MSFT), as shown in the image. The chart displays several Fibonacci levels extending upward from a recent pivot low around $408.17. Here’s how you can interpret the chart:
Clustered Resistance Levels : In the chart, note the grouping of several Fibonacci levels in the range of $450–$470. These levels, particularly when tightly packed, suggest a zone where Microsoft may encounter stronger resistance, as multiple Fibonacci levels signal potential barriers.
Applying Trading Strategies : As price approaches this clustered resistance, traders can watch for weakening momentum. If price begins to stall, it may be wise to lock in profits on long positions or set tighter stop-loss orders.
Observing Momentum Reversals : Look for specific candlestick patterns as price nears these levels, such as bearish engulfing candles or doji patterns. Such patterns can confirm resistance, helping you make informed decisions on whether to exit or manage your position.
Conclusion: Harnessing Fibonacci Extensions with FibExtender
FibExtender is a powerful tool for identifying potential resistance levels without the need for manual Fibonacci calculations. It automates the detection of key swing points and projects Fibonacci extensions, offering traders a straightforward approach to spotting potential resistance zones. For beginners, FibExtender provides a user-friendly gateway to technical analysis, helping you visualize levels where price may react.
For those with a bit more experience, the indicator offers insight into pivot points and Fibonacci calculations, enabling you to fine-tune the analysis for different market conditions. By carefully observing price reactions around clustered levels, users can identify areas of stronger resistance and refine their trade management strategies accordingly.
FibExtender is not just a tool but a framework for disciplined analysis. Using Fibonacci levels for guidance can support your trading decisions, helping you recognize areas where price might struggle or reverse. Integrating FibExtender into your trading strategy can simplify the complexity of Fibonacci extensions and enhance your understanding of resistance dynamics.
Note: Always practice proper risk management and thoroughly test the indicator to ensure it aligns with your trading strategy. Past performance is not indicative of future results.
Trade smarter with TradeVizion—unlock your trading potential today!
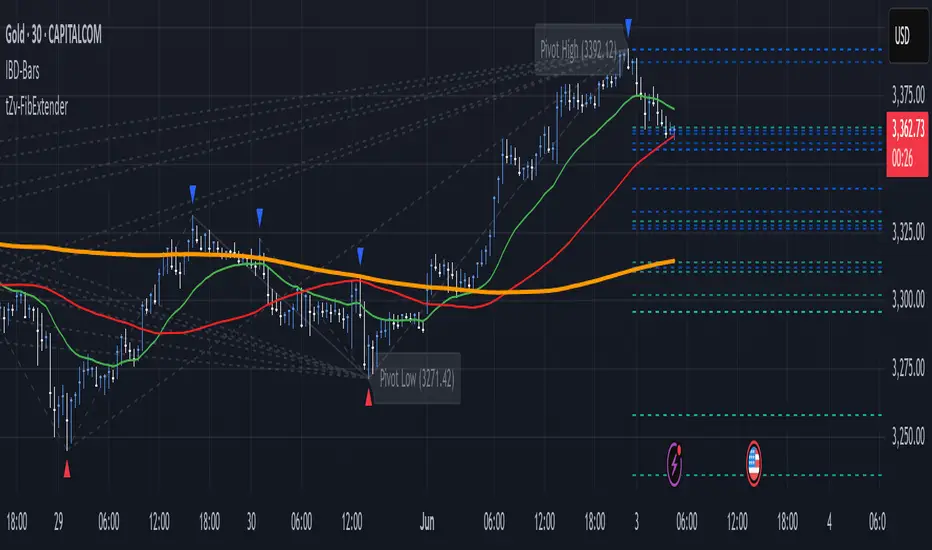
Fibonacci Swing Trading BotStrategy Overview for "Fibonacci Swing Trading Bot"
Strategy Name: Fibonacci Swing Trading Bot
Version: Pine Script v5
Purpose: This strategy is designed for swing traders who want to leverage Fibonacci retracement levels and candlestick patterns to enter and exit trades on higher time frames.
Key Components:
1. Multiple Timeframe Analysis:
The strategy uses a customizable timeframe for analysis. You can choose between 4hour, daily, weekly, or monthly time frames to fit your preferred trading horizon. The high and low-price data is retrieved from the selected timeframe to identify swing points.
2. Fibonacci Retracement Levels:
The script calculates two key Fibonacci retracement levels:
0.618: A common level where price often retraces before resuming its trend.
0.786: A deeper retracement level, often used to identify stronger support/resistance areas.
These levels are dynamically plotted on the chart based on the highest high and lowest low over the last 50 bars of the selected timeframe.
3. Candlestick Based Entry Signals:
The strategy uses candlestick patterns as the only indicator for trade entries:
Bullish Candle: A green candle (close > open) that forms between the 0.618 retracement level and the swing high.
Bearish Candle: A red candle (close < open) that forms between the 0.786 retracement level and the swing low.
When these candlestick patterns align with the Fibonacci levels, the script triggers buy or sell signals.
4. Risk Management:
Stop Loss: The stop loss is set at 1% below the entry price for long trades and 1% above the entry price for short trades. This tight risk management ensures controlled losses.
Take Profit: The strategy uses a 2:1 risk-to-reward ratio. The take profit is automatically calculated based on this ratio relative to the stop loss.
5. Buy/Sell Logic:
Buy Signal: Triggered when a bullish candle forms above the 0.618 retracement level and below the swing high. The bot then places a long position.
Sell Signal: Triggered when a bearish candle forms below the 0.786 retracement level and above the swing low. The bot then places a short position.
The stop loss and take profit levels are automatically managed once the trade is placed.
Strengths of This Strategy:
Swing Trading Focus: The strategy is ideal for swing traders, targeting longer-term price moves that can take days or weeks to play out.
Simple Yet Effective Indicators: By only relying on Fibonacci retracement levels and basic candlestick patterns, the strategy avoids complexity while capitalizing on well-known support and resistance zones.
Automated Risk Management: The built-in stop loss and take profit mechanism ensures trades are protected, adhering to a strict 2:1 risk/reward ratio.
Multiple Timeframe Analysis: The script adapts to various market conditions by allowing users to switch between different timeframes (4hour, daily, weekly, monthly), giving traders flexibility.
Strategy Use Cases:
Retracement Traders: Traders who focus on entering the market at key retracement levels (0.618 and 0.786) will find this strategy especially useful.
Trend Reversal Traders: The strategy’s reliance on candlestick formations at Fibonacci levels helps traders spot potential reversals in price trends.
Risk Conscious Traders: With its 1% risk per trade and 2:1 risk/reward ratio, the strategy is ideal for traders who prioritize risk management in their trades.

Logarithmic and Linear Fibonacci LevelsIntroduction
Fibonacci levels are a technical analysis tool used by some traders to identify potential support and resistance levels. The principle for determining these levels is to take the distance between selected reference high and low points (swing high and swing low in general) as 1 unit and mark the ratios derived from the Fibonacci sequence, such as 0.236, 0.382, 0.618, etc., over this 1 unit. In the conventional method of level determination, the 1 unit is divided into equal distances within itself, and Fibonacci levels are determined based on these equal distances. These types of levels are called Linear Levels . A relatively less common method involves dividing the 1 unit into progressively smaller, more accurately described as proportionally equal, distances and determining Fibonacci levels based on these distances. These types are called Logarithmic Levels . The purpose of this indicator is to provide ease of use in determining both Linear and Logarithmic levels.
Where can it be Used?
Logarithmic Levels can be used in any instrument where volatility is high for any reason. Specifically in crypto, Logarithmic Levels work very well for BINANCE:BTCUSDT (to observe this, please study the wick from January 23, 2024). As another example, Logarithmic Levels can be used to identify potential accumulation and distribution schemes in altcoins with relatively high volume and market capitalization (refer to the chart provided above BINANCE:FETUSDT ). Additionally, when analyzing traditional markets, Logarithmic Levels can be beneficial for stocks with highly inflated or deflated prices (e.g., NASDAQ:TSLA , NASDAQ:NVDA ), in stock markets of countries battling high inflation (e.g., BIST:XU100 ), or in currency pairs of countries experiencing a recession (e.g., FX_IDC:JPYUSD ).
How can it be Used?
It is designed similarly to the Fibonacci Tool provided by Trading View to ensure users feel familiar with it. When you start the indicator, select the reference levels (Level 1 and Level 0), then click on the indicator settings to choose specific levels and customize them according to your preferences.
What Makes it Unique?
Indeed, in the Fibonacci Tool provided by Trading View, we can see both linear and logarithmic levels. However, to view logarithmic levels, it is necessary to switch the relevant instrument's Super Chart to a logarithmic scale. This causes the levels we want to remain 'linear' to also be displayed in their logarithmic form, potentially leading to errors in other indicators we use, incorrect functioning of trend lines drawn in linear scaling, and so on. Additionally, when the Super Chart is scaled logarithmically, it prevents the ability to set alerts for prices and trend lines. This indicator was created to avoid these problems without needing to change the chart's scaling method and to allow the simultaneous viewing of both Linear and Logarithmic levels.

Intraday Fibonacci Levels [Gorb]Welcome to the Intraday Fibonacci Levels indicator, a dynamic and customizable tool designed for traders who incorporate Fibonacci retracements and extensions into their technical analysis. This indicator focuses on intraday price action, allowing you to select a specific candle from any trading session and visualize crucial Fibonacci levels derived from its high and low prices.
Features:
Candle Selection for Fibonacci Analysis: Select any candle based on its time to plot Fibonacci levels, giving you control over the period of analysis.
Customizable .236 and .618 Fibonacci Levels: Plot and customize the .236 and .618 Fibonacci retracement and extension levels. Adjust color and line style for each level to fit your chart preferences.
User-Friendly Interface: Easy-to-use input fields for selecting the candle time and configuring Fibonacci settings. Intuitive toggle options to display or hide specific Fibonacci levels.
Dynamic Updating: The indicator updates in real-time as new price data is received, ensuring you have the latest Fibonacci levels on your chart.
Usage Case:
This indicator is ideal for day traders and technical analysts who utilize Fibonacci tools to identify potential support and resistance levels, trend reversals, or continuation patterns. Whether you are analyzing a high-impact news event candle or a significant pivot point in the trading day, this indicator helps bring clarity to your Fibonacci-based trading strategy.
Guidelines for Usage:
Use the indicator settings to select the candle time and configure your desired Fibonacci levels. You can choose any time you want, in order to use premarket candles you need to enable electronic hours on your chart to have levels plot from pre/post.
These auto plotted levels can act as pivot points or points of support and resistance for traders to make informed trading decisions near these levels. Analyze the plotted Fibonacci levels in conjunction with other technical indicators or price action patterns for informed trading decisions.
Conclusion:
This indicator is a versatile and essential tool for traders who rely on Fibonacci analysis as part of their trading arsenal. By offering the flexibility to analyze specific candles and customize Fibonacci levels, this indicator empowers you to make more informed trading decisions. Its user-friendly design and real-time updating capabilities ensure that you have access to accurate and relevant Fibonacci data at any moment of the trading day.
RISK DISCLAIMER
All content, tools, scripts & education provided by Monstanzer or Gorb Algo are for informational & educational purposes only. Trading is risk and most lose their money, past performance does not guarantee future results.

Fibonacci Timing Pattern IIThe Fibonacci Timing Pattern II is a price-based counter that seeks to determine medium-term reversals in price action. It is based on the following set of conditions:
* For a bullish Fibonacci timing signal II: The current close must be lower than the close prices from one and two periods ago. Simultaneously, the close price from two periods ago must be lower than the close price from three periods ago, and the close price from three periods ago must be lower than the close price from five periods ago. The Fibonacci sequence continues until the close price from thirty four periods ago which must be above the close price from fifty five periods ago.
* For a bearish Fibonacci timing signal II: The current close must be higher than the close prices from one and two periods ago. Simultaneously, the close price from two periods ago must be higher than the close price from three periods ago, and the close price from three periods ago must be higher than the close price from five periods ago. The Fibonacci sequence continues until the close price from thirty four periods ago which must be lower the close price from fifty five periods ago.
The signals of the pattern are ideally used in a sideways market or used in tandem with the trend (bullish signals are taken in a bullish market and bearish signals are taken in a bearish market).
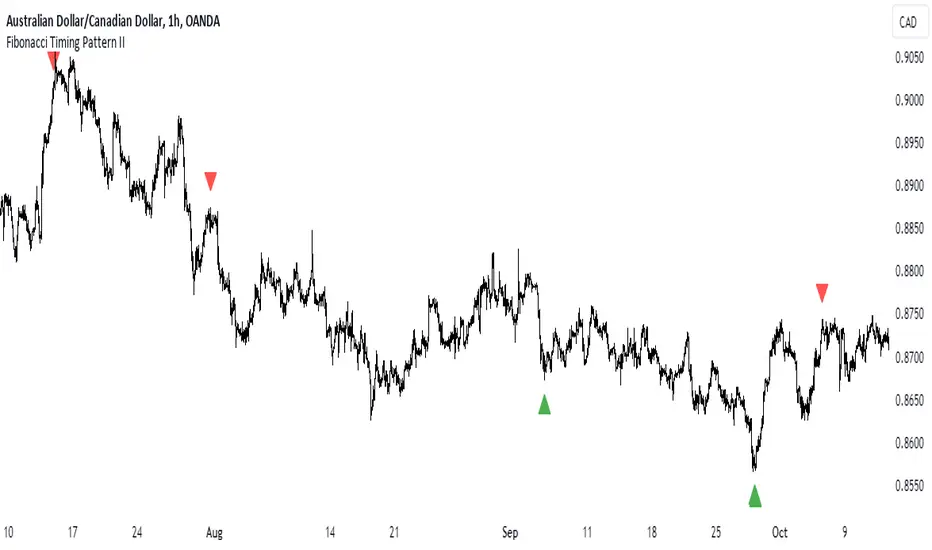
Auto Fibonacci Retracement // Atilla YurtsevenOverview:
This Pine Script™ is a specialized tool for traders, designed to automatically plot Fibonacci retracement levels over a user-defined date range in trading charts. It also indicates the extent of price retracement within these levels.
Key Features:
Date Range Customization: Users can specify the start and end dates to focus the analysis on a particular trading period.
Dynamic Fibonacci Levels: The script includes various Fibonacci ratios (0.0, 0.236, 0.382, 0.5, 0.618, 0.786, 1.0), with the flexibility to enable or disable individual levels.
Visual Customization: Each Fibonacci level can be customized for color and line style (solid, dotted, dashed). Labels for each level are also configurable.
Retracement Measurement: The script not only draws the Fibonacci levels but also measures and displays how much the price has retraced within these levels.
Extension and Additional Options: Users have options to extend the Fibonacci lines and additional features such as using close values, trend drawing, date range display, and more.
Technical Insights:
The script identifies high and low values within the selected time frame, assessing the market's trend direction.
Within the specified date range, this script effortlessly plots the Fibonacci levels automatically, bringing clarity and precision to your market analysis as it unfolds.
The tool's adaptability makes it suitable for various trading styles and chart preferences.
Intended Use:
This script is particularly valuable for technical analysts and traders who use Fibonacci retracements to identify potential support and resistance areas and understand the depth of market corrections or rallies.
Disclaimer:
This Pine Script™ is offered 'as is', without any guarantees or warranties. It is intended for informational purposes and should not be taken as investment advice. Atilla Yurtseven, the creator of this script, assumes no responsibility for any financial losses or gains that may result from its usage. Users should perform their own due diligence and consult with professional advisors before making any investment decisions.
Remember to follow and comment!
Trade smart, stay safe
Atilla Yurtseven
